
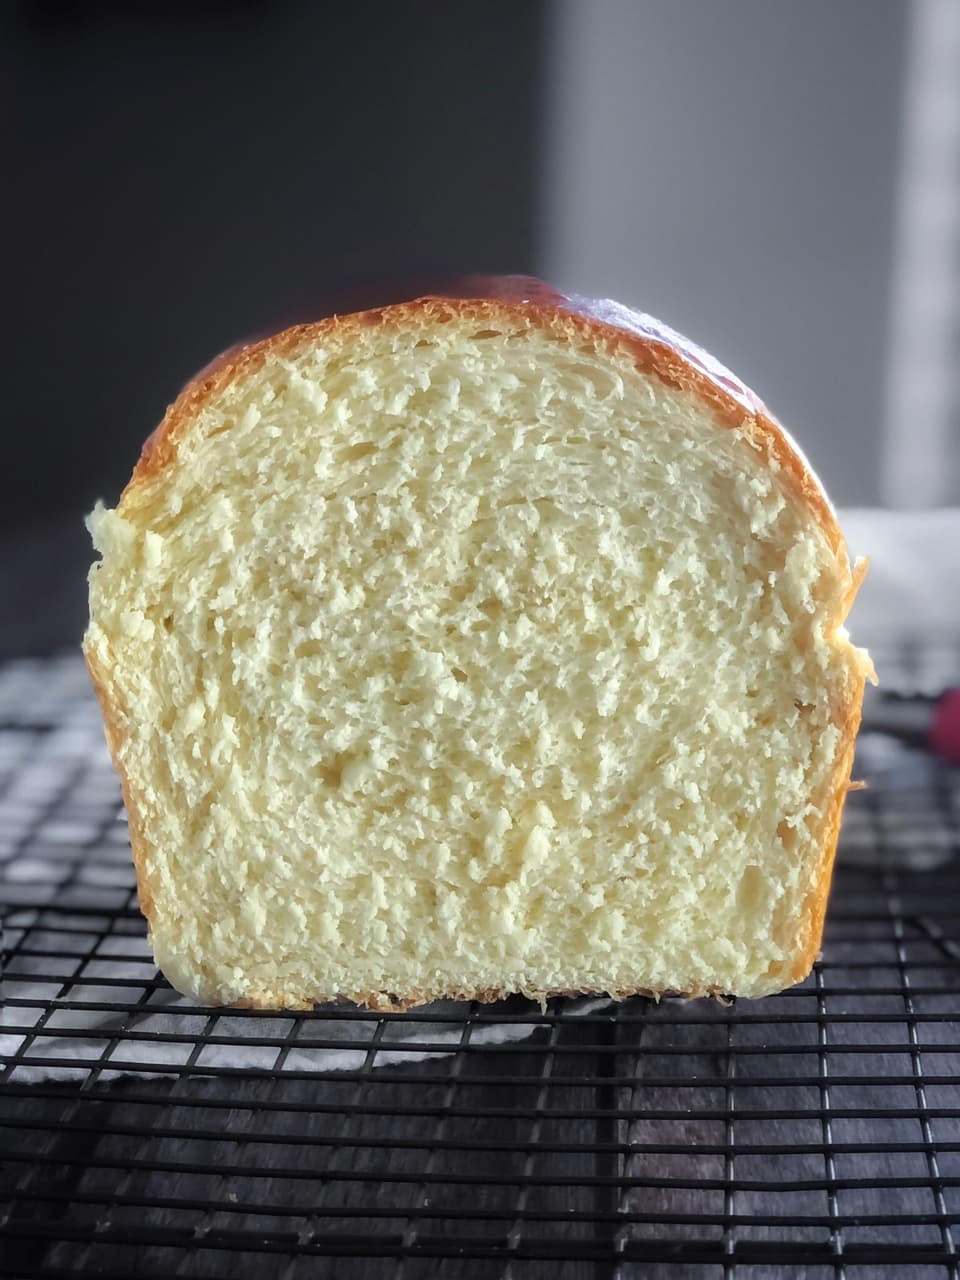
There’s something downright therapeutic about baking bread — the warm kitchen, the smell drifting through the house, and that first soft slice still warm from the oven. This Honey White Bread is one of my favorite homemade bread recipes: soft, tender, slightly chewy, and just sweet enough from the honey. It makes two beautiful loaves that are perfect for sandwiches, toast, or simply eating warm with a little butter.
I’ve been making this honey bread on repeat lately, and it has quickly become a family obsession. The texture reminds me of the loaves from Village Baker: soft, tender, slightly chewy, and impossible to stop eating. My husband insists it should be called “donut bread,” and after sharing a loaf with my daughter, she texted me that it was “stupidly good” and “problematic” because she couldn’t stop eating it. Honestly, if you’re going to eat bread, make it good bread — and this honey white bread delivers every time.
This loaf starts with an enriched dough made with warm milk, honey, melted butter, and an egg. Those ingredients give the bread its soft crumb, rich flavor, and beautiful golden crust. If you love homemade white bread, this is one you’ll want to keep in your regular baking rotation.
If you love homemade bread with a touch of honey, be sure to try my Honey Wheat Bread, too. It has that same slightly sweet flavor, with a hearty wheat twist.
If soft, slightly sweet homemade bread is your weakness, you’ll also want to try my Copycat Texas Roadhouse Rolls. They’re fluffy, buttery, and especially good with cinnamon honey butter.
Tips for the Best Honey White Bread
- Use bread flour, all-purpose flour, or a combination. Bread flour gives the loaves a little more structure and chew, while all-purpose flour makes a wonderfully soft loaf. I often use a combination of the two, so use whichever you have on hand.
- Don’t add all the flour at once. Start with 5½ cups and add more gradually as the dough mixes. You may need some or all of the additional flour, depending on your kitchen’s humidity, temperature, and altitude. The finished dough should be soft and slightly tacky, but it shouldn’t stick to your fingers.
- Give the dough enough time to rise. The first rise should take about an hour, but go by the dough rather than the clock. It should roughly double in size. A cool kitchen can make the rise take longer.
- Don’t skip the milk and butter if you can help it. You can substitute water for milk or oil/shortening for butter, but the texture and flavor will change. The milk and butter are part of what gives this honey bread its soft, tender crumb and rich flavor.
- Use an instant-read thermometer to check for doneness. Homemade bread is fully baked when the center reaches about 190°F. This is a much more reliable test than judging the bread by its color alone and helps keep you from overbaking it.
- Let the loaves cool before slicing. I know it’s hard to wait when your kitchen smells like freshly baked bread! Let the loaves cool for at least 30 minutes before slicing. This gives the crumb time to finish setting and helps you get nice, even slices.
This recipe makes two big loaves in 9×5 inch loaf pans.
Ingredients:
- 2 cups warm milk (about 110-115 degrees)
- 1 Tbsp instant yeast
- 1 tsp sugar
- 5-1/2 to 6-1/2 cups bread flour (can substitute AP flour or do half of each)
- 1/4 cup melted butter (1/2 stick)
- 1/4 cup honey
- 1 egg, slightly beaten
- 1 Tbsp salt
- Egg wash: 1 egg whisked with 1 Tbsp water
- Additional melted butter to brush on when it comes out of the oven
Instructions:
- Put the warm milk in your mixer bowl and sprinkle the yeast and sugar over it. Mix together and let sit for 5 minutes to make sure the yeast activates and gets foamy.
- Add 5-1/2 cups of the flour, the melted butter, honey, egg and salt.
- Use the dough hook attachment to mix the dough together on low speed.
- Add small amounts of bread flour, (up to another cup total but you do NOT have to use the whole cup), just until the dough is the right consistency, (you want a soft dough that is easy to work with, and you want it to feel tacky, but not stick to your fingers.)
- Let the mixer knead the bread on low speed (2 on my KitchenAid) for 5 minutes.
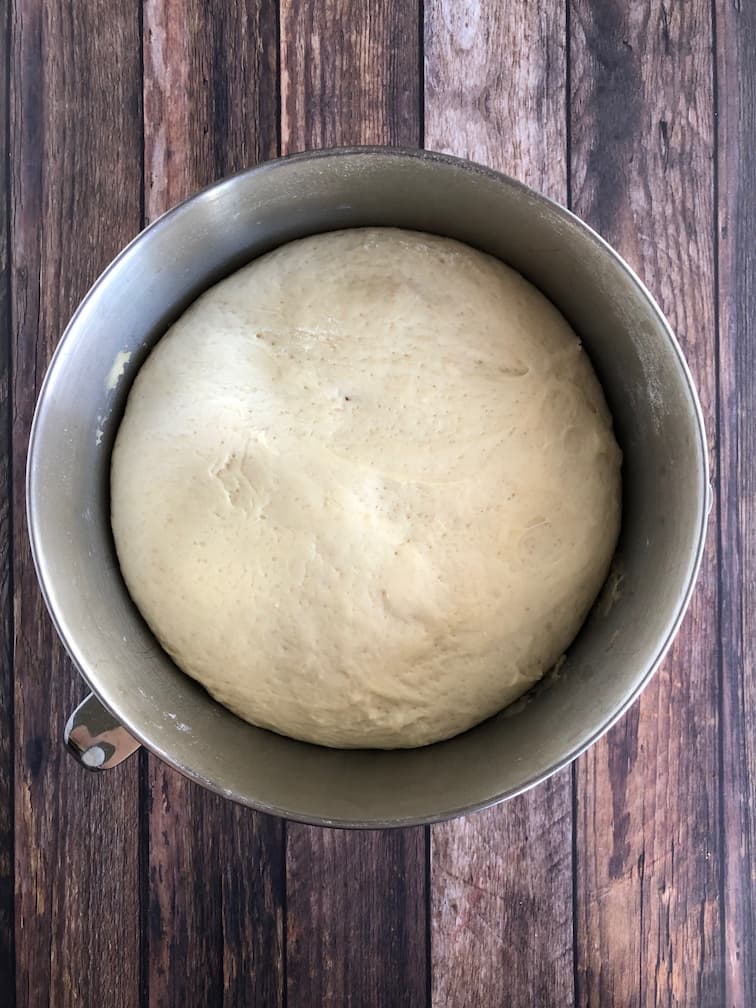
- Scrape the dough in to a ball, place in a large oiled bowl, cover the bowl with plastic wrap and a clean towel and set in a warm place to rise for 1 hour or until it has doubled in size. (I turn the oven on at the lowest temperature for just 1 minute, then turn it off and put the mixing bowl in there.)
- Lightly grease two loaf pans with non-stick spray. (I use 9×5.)
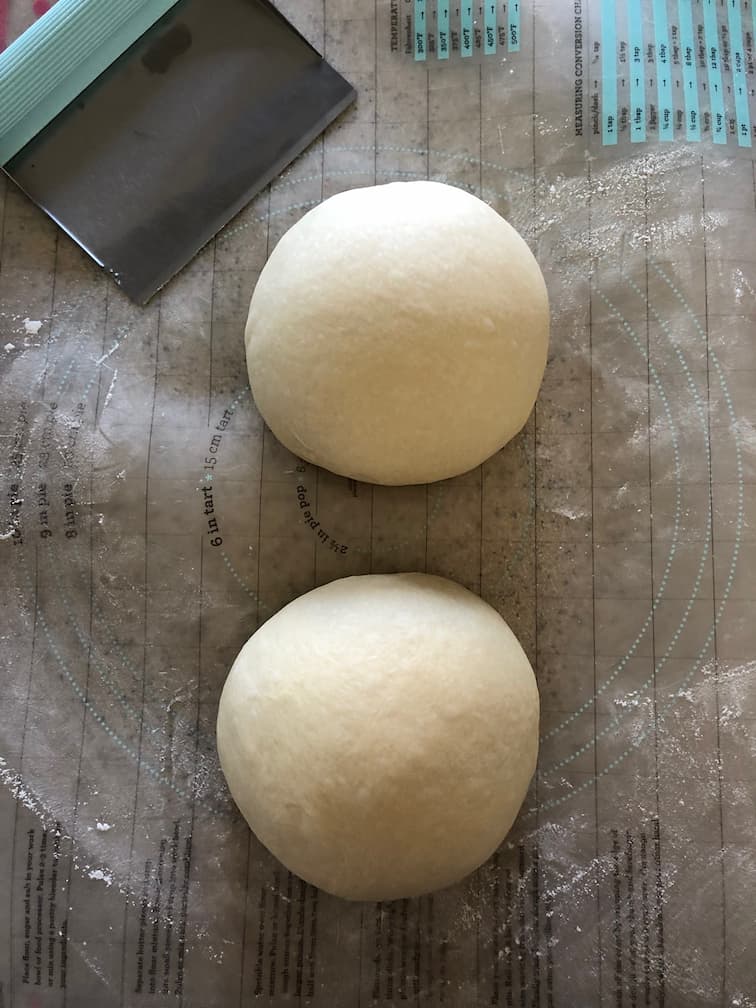
- Once the dough has risen, punch it down with your fist, then turn out on to a lightly floured pastry mat or counter. Divide the dough in two equal portions – shape in to a ball.
- Press or roll the dough out in to a rectangle, fold down a third of the dough from the shorter end and press it down with the heel of your hand. Continue to fold and press until you have a roll – tuck in the ends, and place the bread with seams down in the prepared bread pan. Repeat with the other piece of dough.
- Cover the pans lightly with plastic wrap and let the loaves rise another 30 minutes in a warm place.
- When ready to bake, preheat oven to 350.
- Remove plastic wrap, brush the loaves gently with egg wash, then bake the loaves at 350 for about 30 minutes. (Bread should register 190 degrees with an instant read thermometer to be fully baked, but not overbaked.
- Remove from the oven and let cool 5 minutes in the pans before popping the loaves out of the pans on to a cooling rack and brushing with melted butter.
- Cool the bread for at least 30 minutes before slicing with a serrated knife!


The Best Honey White Bread
EQUIPMENT (Amazon Associate Links)
Ingredients
- 2 cups warm milk (about 110-115 degrees)
- 1 Tbsp instant yeast
- 1 tsp sugar
- 5.5 to 6.5 cups bread flour (can substitute AP flour or do half of each)
- 1/4 cup melted butter (1/2 stick)
- 1/4 cup honey
- 1 egg, slightly beaten
- 1 Tbsp salt
- Egg wash: 1 egg whisked with 1 Tbsp water
- Additional melted butter to brush on when it comes out of the oven
Instructions
- Put the warm milk in your mixer bowl and sprinkle the yeast and sugar over it. Mix together and let sit for 5 minutes to make sure the yeast activates and gets foamy.
- Add 5-1/2 cups of the flour, the melted butter, honey, egg and salt.
- Use the dough hook attachment to mix the dough together on low speed.
- Add small amounts of bread flour, (up to another cup total but you do NOT have to use the whole cup), just until the dough is the right consistency, (you want a soft dough that is easy to work with, and you want it to feel tacky, but not stick to your fingers.)
- Let the mixer knead the bread on low speed (2 on my KitchenAid) for 5 minutes.
- Scrape the dough in to a ball, place in a large oiled bowl, cover the bowl with plastic wrap and a clean towel and set in a warm place to rise for 1 hour or until it has doubled in size. (I turn the oven on at the lowest temperature for just 1 minute, then turn it off and put the mixing bowl in there.)
- Lightly grease two loaf pans with non-stick spray. (I use 9x5.)
- Once the dough has risen, punch it down with your fist, then turn out on to a lightly floured pastry mat or counter. Divide the dough in two equal portions - shape in to a ball.
- Press or roll the dough out in to a rectangle, fold down a third of the dough from the shorter end and press it down with the heel of your hand. Continue to fold and press until you have a roll - tuck in the ends, and place the bread with seams down in the prepared bread pan. Repeat with the other piece of dough.
- Cover the pans lightly with plastic wrap and let the loaves rise another 30 minutes in a warm place.
- When ready to bake, preheat oven to 350.
- Remove plastic wrap, brush the loaves gently with egg wash, then bake the loaves at 350 for about 30 minutes. (Bread should register 190 degrees with an instant read thermometer to be fully baked, but not overbaked.
- Remove from the oven and let cool 5 minutes in the pans before popping the loaves out of the pans on to a cooling rack and brushing with melted butter.
- Cool the bread for at least 30 minutes before slicing!
Notes
- Use bread flour, all-purpose flour, or a combination. Bread flour gives the loaves a little more structure and chew, while all-purpose flour makes a wonderfully soft loaf. I often use a combination of the two, so use whichever you have on hand.
- Don't add all the flour at once. Start with 5½ cups and add more gradually as the dough mixes. You may need some or all of the additional flour, depending on your kitchen's humidity, temperature, and altitude. The finished dough should be soft and slightly tacky, but it shouldn't stick to your fingers.
- Give the dough enough time to rise. The first rise should take about an hour, but go by the dough rather than the clock. It should roughly double in size. A cool kitchen can make the rise take longer.
- Don't skip the milk and butter if you can help it. You can substitute water for milk or oil/shortening for butter, but the texture and flavor will change. The milk and butter are part of what gives this honey bread its soft, tender crumb and rich flavor.
- Use an instant-read thermometer to check for doneness. Homemade bread is fully baked when the center reaches about 190°F. This is a much more reliable test than judging the bread by its color alone and helps keep you from overbaking it.
- Let the loaves cool before slicing. I know it's hard to wait when your kitchen smells like freshly baked bread! Let the loaves cool for at least 30 minutes before slicing. This gives the crumb time to finish setting and helps you get nice, even slices.
Honey White Bread FAQs
What makes this honey white bread so soft?
This loaf uses an enriched dough made with milk, melted butter, honey, and an egg. These ingredients add richness and moisture, creating a tender crumb and soft, bakery-style texture.
Can I use all-purpose flour instead of bread flour?
Yes! All-purpose flour works well in this honey bread recipe, though bread flour gives the loaf a little more structure and chew. You can also use a combination of bread flour and all-purpose flour.
Can I use honey instead of sugar in bread?
Yes. Honey adds sweetness and moisture to bread while also contributing a subtle honey flavor. This recipe uses honey as the primary sweetener, along with a small amount of sugar to help activate the yeast.
How much flour should I add to honey white bread?
Start with 5½ cups of flour and add more a little at a time as needed. You may use up to another cup, but you don’t necessarily need all of it. The dough should feel soft and slightly tacky but should not stick to your fingers. The exact amount can vary depending on humidity, temperature, and altitude.
Can I substitute water for the milk?
You can, but the bread won’t be quite as soft or rich. Milk adds tenderness, moisture, and flavor to this honey white bread, so I recommend using milk when possible.
Is honey white bread good for sandwiches?
Absolutely! This bread has a soft, tender crumb that makes it especially good for sandwiches and toast. The slight sweetness from the honey pairs well with both sweet and savory fillings.
How do I know when honey white bread is fully baked?
The loaves should reach an internal temperature of about 190°F. The tops should be golden brown, and the bread should sound hollow when tapped. An instant-read thermometer is the most reliable way to check for doneness without overbaking the bread.
How should I store homemade honey bread?
Once completely cooled, store the bread in an airtight container or bread bag at room temperature for several days. For longer storage, you can freeze the loaves or individual slices and thaw them as needed.


I love this bread so much. I tried a very different recipe and got very discouraged. I saw yours and said let’s go! I’m so proud of them!! I know I’m a dork but you have given me the confidence to try other types to! I love that its actually a very nice sandwich bread. WE(my family and I)love this bread.
Thank you so much.
Wanda
I’m so happy to hear that Wanda! It truly makes my day to hear you are gaining confidence to try other recipes, so great! Thank you for the rating and comments! 🙂
If I hand knead this instead of using a dough hook are there any special considerations?
If I want to bake this in a Pullman pan 13 inch with lid, to get that nice square shape, are there any alterations like baking time and temp? Thanks in advance!
I have never made this in a pullman pan, so not sure on how that would change the baking time and temp. If you hand knead it will need to be 10-15 minutes.
The bread smells so yummy!! Mine has baked for 30 minutes and has a nice crunch on the top, but the inside temp is reading in the 150/160’s. Is this normal?? I put it back in just for a few more minutes but I don’t want to cook it for too long.
I wonder if your thermometer is registering correctly – there is no way it should be that low after 30 minutes. I hope it turned out good for you! 🙂
My husband has decided that there are too many preservatives in store bought bread. I found this recipe and it is now our house bread. I make 2 loaves most every weekend. When cool I cut in 1/2, double wrap and freeze. There are only 2 of us but he loves sandwiches. This works out perfectly. Recently I gave a fresh loaf to my daughter in law. 5⭐️ review!
Oh my goodness, this make me smile. Thank you for sharing and rating! It always makes my day! 🙂
Can you substitute buttermilk for regular milk in this recipe?
I haven’t ever tried it for this recipe – buttermilk is more acidic, so it could affect the yeast rise (add a pinch more yeast), and make the bread more tangy. This is my favorite bread recipe, so I don’t usually recommend anything that might affect the flavor – but if you try it, let me know how it turns out!
I substituted the milk for water and instead of sugar I just use more honey. But it tastes good! And I’ve gotten lots of compliments on this bread recipe!
I’m so glad to hear that – thank you so much for commenting it makes my day!
This is the first bread recipe I’ve ever tried. Let me tell you after making this is can’t even buy bread anymore. Thank you so much, I love this site!
I’m so glad you like it!! Thanks for commenting and rating it makes my day every time. 🙂
My go to recipe for bread! Thank you!
I’m so glad you like it! Thank you so much for commenting and rating! 🙂
Delicious! My very first time making loaves of bread, I used mostly organic ingredients and it turned out perfectly. I don’t have a stand mixer so I hand kneaded it for around 10-15 minutes and I used regular active yeast instead of instant. Other than that, I followed the recipe to the T and my family loves it! Not too sweet or salty, great balance and texture. I wish I could add pictures
This always makes my day to hear. Thank you so much for commenting and rating! 🙂
Can make this in my bread machine?
Bread machines require specific measurements for a specific sized loaf – and this makes two loaves, so I would not recommend.
I love this bread so much. I tried a very different recipe and got very discouraged. I saw yours and said let’s go! I’m so proud of them!! I love that its actually a very nice sandwich bread. WE(my family and I)love this bread.
Thank you so much.
Wanda
Thank u for posting this bread recipe for us, also, how you explain it is great and boosted my confidence to make it! Its in oven now, I cant wait to try it, after it cools, if I can contain myself that long, ha!
Ah, I’m so happy to hear that! Thank you for commenting and rating – hope you love it as much as me! 🙂
This is by far the best bread I have ever eaten.I love bread I try them all. This is my favorite!!! People ask me if I have ever thought of tweaking a bit and I tell them you don’t mess with perfection!❤️❤️
Ah, this means so much to me, thank you so much! I just made this yesterday – it is my favorite ever too! Thank you for sharing and making my day. 🙂
perfect recipe! thank you for sharing 🖤
Thank you for commenting and rating it truly makes my day! 🙂
I would love to try this recipe but I don’t have a stand mixer. Any suggestions for hand mixing ?
You can hand knead this bread – it just takes more time. Don’t add all the flour at one time – mix with a bread whisk or wooden spoon and add flour a little at a time until it starts to become a little stiff to mix, then empty on to a well floured, clean surface. You will need to knead the bread by hand for about 15 minutes. Continue adding flour as you knead just until the dough is tacky, but does not stick to your hands. You probably won’t need all of it, but it depends on elevation, weather, etc. It’s a lot more work to hand knead, but can be very therapeutic!
This is my go to recipe. I make this all the time and we no longer buy bread from the store. Thank you for posting!
This makes my day. Thank you for commenting and rating! 🙂
I’ve made this recipe so many times and it has turned out amazing every single time!
Am I able to use buttermilk instead of milk?
I’ve never tried it with buttermilk! Buttermilk does have a distinct flavor and the acid could slightly affect yeast activity. If you give it a try, you may have to increase the yeast a little so it still gets the full rise. Let me know how it turns out if you try it! 🙂
Is it possible to use to use active yeast instead of instant? How much would I need to use?
Yes, you can switch out active yeast for the instant yeast equal amounts – just be sure to dissolve it in the warm milk with the sugar for five minutes to activate it, (you don’t have to do that with instant I just always do it anyways so I know my yeast is going to work.) I used both in this recipe with great results.
This bread is amazing! My husband said it’s the best bread I’ve ever made. No more store bought bread for us. Thank you for sharing your recipe. You are a blessing!
Ah, thank you so much for commenting and rating – this makes my day. 🙂
Found and made this today. Absolutely fantastic!!! Definitely recommend it. Easy to make, great instructions. Wife and I both enjoyed it.
This makes me so happy. This is my favorite bread recipe on my site! Thank you so much for commenting and rating – it is much appreciated 🙂
Literally comes out just like the picture! First time making bread with this recipe. I was so nervous making It for the first time but It came out amazing!!! My whole family loved It. Definitely not buying store bought bread again!
I am so happy to hear that! Thank you so much for commenting and rating – it truly makes my day.:)
Excited to try this! I wanted to ask about the salt. That seems like alot. Does it offset well in the bread?
Yes, it’s a flavor enhancer and balances out the sweet. The bread doesn’t taste overly salty. 🙂
Do you have an ingredient list with weight in grams s
Hi
Can you make this in a bread maker ?
I have not tried this in a bread maker – those recipes usually have specific measurements for the size of the bread maker.
How does this freeze? I have milk that needs to be used up, so I want to make a bunch of loaves and freeze them. Everyone in the house loves this recipe! It set up so well, the gluten to yeast ratio was perfect so it’s perfectly fluffy. Love it!
It freezes great, just let it completely cool, slice if you want, then wrap in double plastic wrap and then some foil so it doesn’t freezer burn. 🙂
First time ever making bread and this was FOOL PROOF!! Not only was it easy it was delicious- fluffy, crunch top, great flavor!
Recommend 10000xs
Ah, you made my day – I’m so glad you like it. Thank you so much for the rave review, I appreciate it! 🙂
I tired your recipe for the first time today and immediately took the other bread recipes I’d saved and disposed of them. I tried making bread several times without much success but I followed the recipe and got 2 beautiful loaves of bread. They taste amazing. I even put a couple of slices with brown sugar cinnamon mixture on top in the broiler. Amazing cinnamon toast because of the read.
Thank you for posting the recipe.
This makes me so happy! I have a few bread recipes on the blog, but this one is my absolute fav. I’m so glad you like it. Thank you so much for commenting and rating – it makes my day every single time. 🙂
Really delicious. It was my 10 year old’s first oven bread (we do bread machine a lot). I know I made the mistake of mixing gluten free flour and regular bread flour so it didn’t rise very much. Definitely keeping this recipe!
Oh this makes me so happy! This is my FAVORITE bread ever. Thank you for commenting and rating, it makes my day every time! 🙂
I’m new to the bread making world. Finally taking advantage of my KitchenAide mixer. I’ve only tried a couple of recipes that was given me by a family member who suggested it as my first try. It came out OK, I guess you could say but I found the texture to be a bit too “tough”?
Anyway, I just made your recipe and am totally IN LOVE with it!! 😍😍 The taste….👏🏽 soooo good! The texture……again 👏🏽 spot on to what I was looking for. The closest to store bought breads 🍞. I love a softer loftier textured bread. Mahalo for your recipe.
Ah, this makes me so happy – thank you so much for commenting and rating. It truly makes my day.💚
Is one tablespoon of salt correct? Just seemed like a lot in comparison to some other recipes I’ve tried. Haven’t found one I love yet, so fingers crossed this one is it ☺️
Yes, that is the correct amount of salt!!
This bread turned out PERFECTLY. The texture is exactly what I needed/wanted for sandwiches. I found my holy grail ☺️
Hi. Could you give the weights for this recipe. It’s really hard to get a consistent dough when cup measurements are used for the flour and I would really like to try this one
This bread recipe is excellent. Top notch! Made it twice now and it is delicious!!
This bread is so good. Is there any place I can get a nutritional breakdown? My daughter is diabetic and it messes her numbers a lot, but she loves it so much.
I’m working on getting the nutritional info added for all recipes with the recipe card. 🙂