
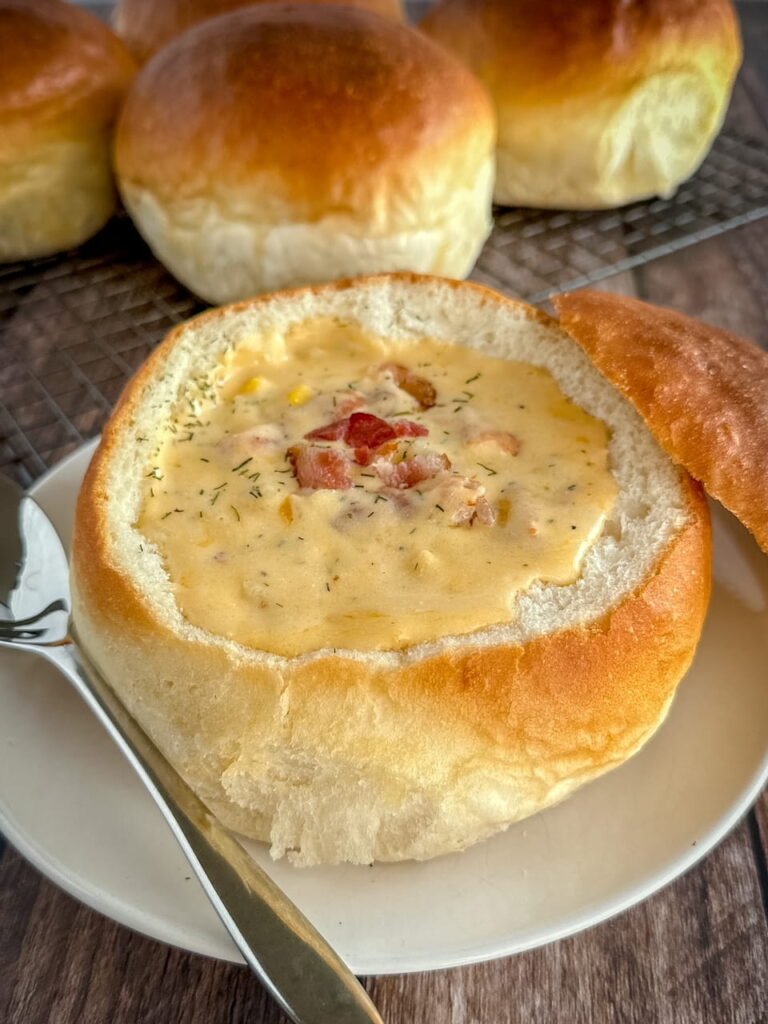
I don’t know what it is that makes a creamy soup served in a homemade bread bowl so dreamy and comforting! Have you ever tried making your own bread bowls? They are quite simple to make and take only a handful of pantry ingredients. Whoever originally thought of using them as the actual bowl for the soup was quite genius as that crusty bread just sops up the soup and gives you a delightful piece of bread to tear apart to eat at the end of your meal.
There is very little hands on time needed to make bread bowls, most of the time is the dough resting, so it’s super easy to throw the dough together in the afternoon before making dinner and you have those warm and fresh bread bowls on the cooling rack by the time you are ready to serve dinner. My absolute favorite soup to serve in these bowls is this Cheesy Potato Bacon Corn Chowder. It uses frozen hashbrowns for the potatoes so there is very little prep and it’s so creamy and delicious, you will not be able to stop eating it.
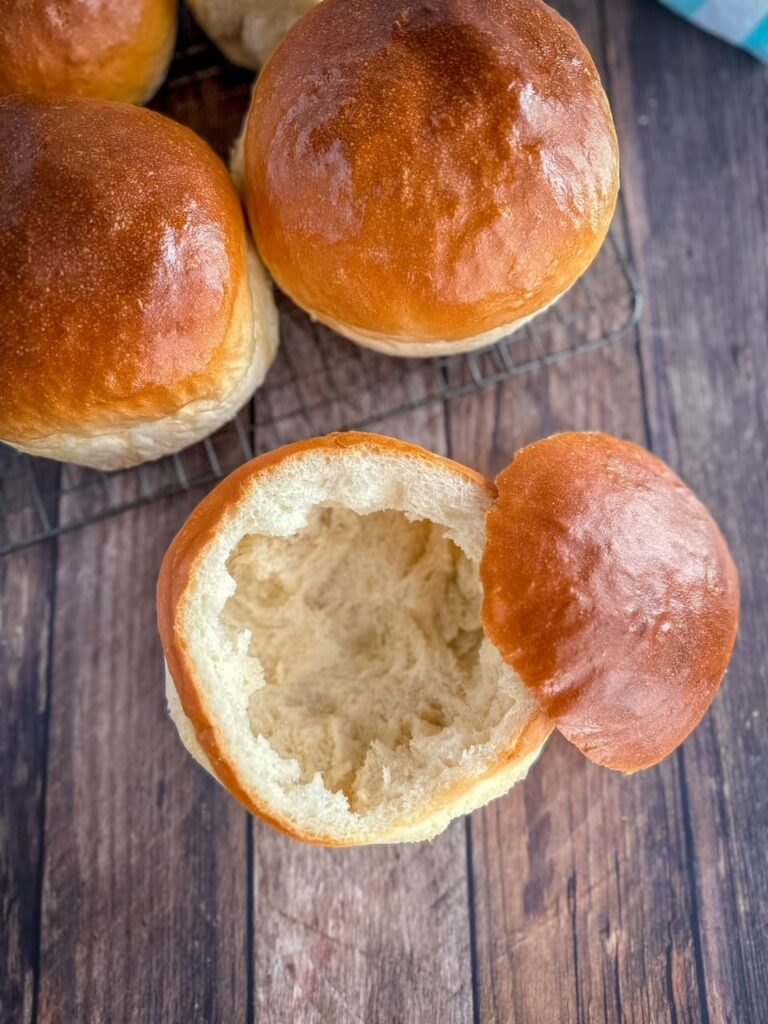
When I originally made the bread bowls for the first time, my daughter Dee told me I was to never buy store bought ones again as these were so much more delicious. They are definitely my first choice as I love both the size and the perfect golden crusty outside with soft, delicious bread all through the middle.
A couple of tips for this recipe:
- You can use dry instant or dry active yeast for these bread bowls. Instant yeast honestly means you can just stir in the yeast with the other ingredients and not worry about proofing, however I always proof my yeast – I want to see it get puffy so I know it’s going to work before adding the other ingredients. I guess you could say it’s my little safety measure. If yeast doesn’t get puffy, it won’t work and you need to buy some fresh yeast.
- I like using just bread flour for these because it helps give them more structure and you kind of want that for bread bowls so it can hold up to hot soup inside. However, you can use AP flour in a pinch if that’s all you have on hand.
- How much flour you need can vary depending on weather, altitude, and temperature of your kitchen just to name a few, so you really have to pay attention to the dough to know when to stop adding flour. Your dough should be tacky to the touch, but not stick to your fingers. Once it feels right – stop adding flour.
- These bread bowls are great for soup, but also make a lovely bowl for serving dip! Think spinach artichoke or even just some ranch! Once you make your own you won’t want store bought again! Have a go at making these, you won’t regret it. I’ve added a ton of process pics below to help you succeed!
Ingredients:
- 2-1/4 cups warm water (about 110-115 degrees)
- 1-1/2 Tbsps dry instant yeast
- 1 Tbsp granulated sugar
- 6 to 6-1/2 cups bread flour (can substitute AP in a pinch, but bread is best)
- 1 Tbsp salt
- 3 Tbsps olive oil
Instructions:
- Place warm water in a small bowl or glass measuring cup. Sprinkle in the yeast then sprinkle the sugar over the top of the yeast. Stir and let sit for a couple of minutes, (the yeast will become foamy – that let’s you know it’s fresh and ready.)
- In your mixer bowl, add 6 cups of the flour and the salt and whisk until combined.
- To the flour mixture add the yeast mixture and olive oil. Mix with the dough hook until combined, scraping down as needed. Add remaining flour by the spoonful ONLY IF NEEDED until the dough is tacky but not overly sticky on your fingers. (You might not need any or all of the remaining flour.) Let the mixer knead the dough for 5 minutes on low speed (I use speed 2 on my Kitchen Aid.)
- Remove the bowl from the mixer, remove the dough hook and use a spatula to gently bring the dough together. Move the dough around the bowl while you spray lightly underneath with non stick cooking spray. Lightly spray the top of the dough, cover the bowl with saran wrap and a clean cotton kitchen towel and then let rise in a warm spot for an hour or until it is doubled in size.
- Line one extra large or two large baking sheets with silicone mats or parchment paper.
- Once the dough has risen, punch it down, empty it out on to a lightly floured surface, and divide into six equal size pieces.
- Work with one piece of dough at a time. Flatten the dough out with the palm of your hand or rolling pin to get rid of any bubbles, then form each piece in to a ball by pulling the edges of the dough in to the center, then flipping over and using your cupped hands to gently spin the dough on the floured surface until it is nice and smooth.
- Place the balls on the baking sheet(s) so they have plenty of space between them, then cover again with the cotton towel and let rise again in a warm spot for about 30 minutes.
- When ready to bake, preheat oven to 375. (You can spray each of the balls with a little warm water at this point to make them a little extra chewy! This is optional.)
- Bake on the middle rack for 15-20 minutes, or until golden brown, (bread should register around 190 degrees with an instant read thermometer to be beautifully baked ).
- Remove from the oven and transfer to a cooling rack to cool.
- When ready to use, slice off the tops, scoop out the insides with your hands, and fill with soup or even your favorite dip! (Serve the scooped out insides on the side for dipping in the soup or dip.)


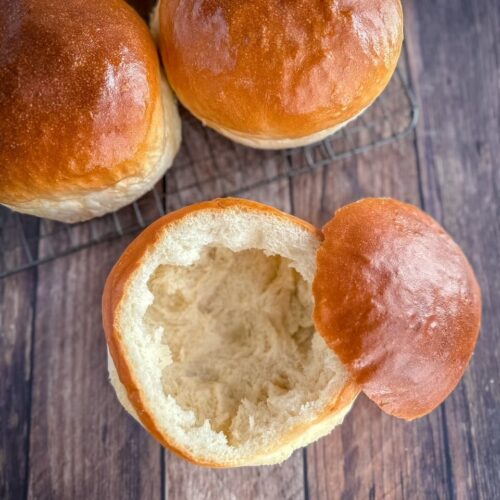
Homemade Soft and Crusty Bread Bowls
EQUIPMENT (Amazon Associate Links)
Ingredients
- 2-1/4 cups warm water about 110-115 degrees
- 1-1/2 Tbsps dry instant yeast
- 1 Tbsp granulated sugar
- 6 to 6-1/2 cups bread flour (can substitute AP in a pinch, but bread is best)
- 1 Tbsp salt
- 3 Tbsps olive oil
Instructions
- Place warm water in a small bowl. Sprinkle in the yeast then sprinkle the sugar over the top of the yeast. Stir and let sit for a couple of minutes, (the yeast will become foamy - that let's you know it's fresh and ready.)
- In your mixer bowl, add 6 cups of the flour and the salt and whisk until combined.
- To the flour mixture add the yeast mixture and olive oil. Mix with the dough hook until combined, scraping down as needed. Add remaining flour by the spoonful ONLY IF NEEDED until the dough is tacky but not overly sticky on your fingers. (You might not need any or all of the remaining flour.) Let the mixer knead the dough for 5 minutes on low speed (I use speed 2 on my Kitchen Aid.)
- Remove the bowl from the mixer, remove the dough hook and use a spatula to gently bring the dough together. Move the dough around the bowl while you spray lightly underneath with non stick cooking spray. Lightly spray the top of the dough, cover the bowl with saran wrap and a clean cotton kitchen towel and then let rise in a warm spot for an hour or until it is doubled in size.
- Line one extra large or two large baking sheets with silicone mats or parchment paper.
- Once the dough has risen, punch it down, empty it out on to a lightly floured surface, and divide into six equal size pieces.
- Work with one piece of dough at a time. Flatten the dough out with the palm of your hand or a rolling pin to get rid of any bubbles, then form each piece in to a ball by pulling the edges of the dough in to the center, then flipping over and using your cupped hands to gently spin the dough on the floured surface until it is nice and smooth.
- Place the balls on the baking sheet(s) so they have plenty of space between them, then cover again with the cotton towel and let rise again in a warm spot for about 30 minutes.
- When ready to bake, preheat oven to 375. (You can spray each of the balls with a little warm water at this point to make them a little extra chewy! This is optional.)
- Bake on the middle rack for 15-20 minutes, or until golden brown, (bread should register around 190 degrees with an instant read thermometer to be beautifully baked ).
- Remove from the oven and transfer to a cooling rack to cool.
- When ready to use, slice off the tops, scoop out the insides with your hands, and fill with soup or even your favorite dip! (Serve the scooped out insides on the side for dipping in the soup or dip.)
Notes
- You can use dry instant or dry active yeast for these bread bowls. Instant yeasts honestly means you can just stir in the yeast with the other ingredients and not worry about proofing, however I always proof my yeast - I want to see it get puffy so I know it's going to work before adding the other ingredients. I guess you could say it's my little safety measure. If yeast doesn't get puffy, it won't work and you need to buy some fresh yeast.
- I like using just bread flour for these because it helps give them more structure and you kind of want that for bread bowls so it can hold up to hot soup inside. However, you can use AP flour in a pinch if that's all you have on hand.
- How much flour you need can vary depending on weather, altitude, and temperature of your kitchen just to name a few, so you really have to pay attention to the dough to know when to stop adding flour. Your dough should be tacky to the touch, but not stick to your fingers. Once it feels right - stop adding flour.
- These bread bowls are great for soup, but also make a lovely bowl for serving dip! Think spinach artichoke or even just some ranch! Once you make your own you won't want store bought again!
Do these freeze okay? If so what are your recommendations?
Yes, you could freeze. I would wrap in plastic wrap, then place in freezer bags for no more than 3 months. When you take them out, thaw, then reheat for about 10 mins at 350 right before serving! 🙂
Made these today for homemade broccoli cheddar soup and they were PERFECT. So yummy, all four kids were thrilled and this single mama won brownie points. Thank you!!
Ah, that makes me so happy! Thank you for commenting and rating! 🙂
This is the first recipe for bread bowls that actually worked for me. All others I have tried produced heavy frisbees. Thank you for sharing this recipe!
Ah that makes me so happy! Thank you for commenting and rating. 🙂
These were such a hit last week, I’m making them again tonight and company is coming over. Super ease to follow! “Bowl” hold up really well! I usually make my own sour dough, but wanted something fresh and quick. I use the bread proof function on my oven and it usually rises in about an hour, on first rise.
Ah this makes me so happy, thank you for sharing and rating! It makes my day! 🙂
I’ve made many different bread bowls but THIS one is the best. It’s very simple compared to most recipes and the crust is nice and chewy. 10/10
Ah, I am so glad you like them! 🙂 Thank you so much for commenting and rating – It makes my day every time.
Trying them tonight with home made potato and bacon soup! Cant wait!
I’ve made many different bread bowls but THIS one is the best. It’s very simple compared to most recipes and the crust is nice and chewy. 10/10
At what point before cooking is it best to freeze the rest of the dough if you only need one bowl?
TIA!
Hi Barbara! You can freeze bread dough after its first rise and shaping. Wrap it tightly to prevent freezer burn, then place it in the freezer. When ready to bake, thaw the dough in the refrigerator overnight or at room temperature until soft. Allow it to complete its second rise, then bake as usual.
This recipe has been so easy to follow and work with. My first batch are in the oven now!
How long will these last on the counter? What’s the best way to keep them fresh the longest?
Made these today. Internal temp read 190 however they did not get brown on top. What happened?
That sounds like an oven issue – you could try moving them to a higher shelf, adding an egg wash before baking, or calibrate your oven with an oven thermometer!
I can’t wait to try this recipe. It has gotten very difficult to find bread the right size/type for bread bowls around here. I’m not great at making homemade bread, but I want to try.
I do not have a stand mixer, however. Can you please tell me how to adjust the procedure to use a hand mixer with regular beaters or just by hand. I don’t mind kneading by hand.
You can definitely hand knead this – you will need to knead it for 10-15 minutes.