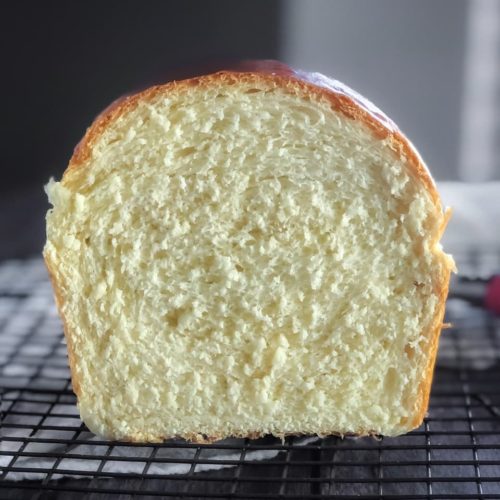
The Best Honey White Bread
Soft, tender honey white bread made with milk, butter, honey, and egg. This homemade loaf is slightly sweet, wonderfully soft, and absolutely irresistible warm from the oven.
Ingredients
- 2 cups warm milk (about 110-115 degrees)
- 1 Tbsp instant yeast
- 1 tsp sugar
- 5.5 to 6.5 cups bread flour (can substitute AP flour or do half of each)
- 1/4 cup melted butter (1/2 stick)
- 1/4 cup honey
- 1 egg, slightly beaten
- 1 Tbsp salt
- Egg wash: 1 egg whisked with 1 Tbsp water
- Additional melted butter to brush on when it comes out of the oven
Instructions
- Put the warm milk in your mixer bowl and sprinkle the yeast and sugar over it. Mix together and let sit for 5 minutes to make sure the yeast activates and gets foamy.
- Add 5-1/2 cups of the flour, the melted butter, honey, egg and salt.
- Use the dough hook attachment to mix the dough together on low speed.
- Add small amounts of bread flour, (up to another cup total but you do NOT have to use the whole cup), just until the dough is the right consistency, (you want a soft dough that is easy to work with, and you want it to feel tacky, but not stick to your fingers.)
- Let the mixer knead the bread on low speed (2 on my KitchenAid) for 5 minutes.
- Scrape the dough in to a ball, place in a large oiled bowl, cover the bowl with plastic wrap and a clean towel and set in a warm place to rise for 1 hour or until it has doubled in size. (I turn the oven on at the lowest temperature for just 1 minute, then turn it off and put the mixing bowl in there.)
- Lightly grease two loaf pans with non-stick spray. (I use 9x5.)
- Once the dough has risen, punch it down with your fist, then turn out on to a lightly floured pastry mat or counter. Divide the dough in two equal portions - shape in to a ball.
- Press or roll the dough out in to a rectangle, fold down a third of the dough from the shorter end and press it down with the heel of your hand. Continue to fold and press until you have a roll - tuck in the ends, and place the bread with seams down in the prepared bread pan. Repeat with the other piece of dough.
- Cover the pans lightly with plastic wrap and let the loaves rise another 30 minutes in a warm place.
- When ready to bake, preheat oven to 350.
- Remove plastic wrap, brush the loaves gently with egg wash, then bake the loaves at 350 for about 30 minutes. (Bread should register 190 degrees with an instant read thermometer to be fully baked, but not overbaked.
- Remove from the oven and let cool 5 minutes in the pans before popping the loaves out of the pans on to a cooling rack and brushing with melted butter.
- Cool the bread for at least 30 minutes before slicing!
Notes
Tips for the Best Honey White Bread
- Use bread flour, all-purpose flour, or a combination. Bread flour gives the loaves a little more structure and chew, while all-purpose flour makes a wonderfully soft loaf. I often use a combination of the two, so use whichever you have on hand.
- Don't add all the flour at once. Start with 5½ cups and add more gradually as the dough mixes. You may need some or all of the additional flour, depending on your kitchen's humidity, temperature, and altitude. The finished dough should be soft and slightly tacky, but it shouldn't stick to your fingers.
- Give the dough enough time to rise. The first rise should take about an hour, but go by the dough rather than the clock. It should roughly double in size. A cool kitchen can make the rise take longer.
- Don't skip the milk and butter if you can help it. You can substitute water for milk or oil/shortening for butter, but the texture and flavor will change. The milk and butter are part of what gives this honey bread its soft, tender crumb and rich flavor.
- Use an instant-read thermometer to check for doneness. Homemade bread is fully baked when the center reaches about 190°F. This is a much more reliable test than judging the bread by its color alone and helps keep you from overbaking it.
- Let the loaves cool before slicing. I know it's hard to wait when your kitchen smells like freshly baked bread! Let the loaves cool for at least 30 minutes before slicing. This gives the crumb time to finish setting and helps you get nice, even slices.