
Is there anything better than freshly baked bread straight out of the oven? I got a new baguette baking pan from Amazon a few weeks ago and have been dying to give it a go. (I didn’t even know there was such a thing before, did you?) Let me tell you, it’s a game changer. I love using this pan for this Easy French Baguette Bread. I love that my loaves stay relatively straight and it cooks them perfectly because of all those little holes in it.
Crispy on the outside, soft on the inside, and the perfect amount of chewiness – this French Bread recipe is complete bread perfection I tell you. If you don’t have a baguette baking pan, you can definitely use two regular baking sheets, (2 loaves on each), but if it’s something you are going to make a lot, you could treat yourself!
I always have good intentions of sharing these loaves of bread, but they don’t last long enough for me to ever give any away. The family LOVES them! Just today, one ate it plain right off the cooling rack, one used it to dip in a creamy pasta dish and one made a sub sandwich with it. It’s been less than two hours and two of the four loaves are gone already! Seriously, give this bread a try. You are going to love it and you will never want store bought French bread again.
Ingredients:
- 1/2 cup very warm water
- 2 Tbsp instant yeast
- 2 cups hot water
- 3 Tbsp sugar
- 1 Tbsp salt
- 5 Tbsp canola oil
- 2 cups bread flour
- 3-1/2 to 4 cups AP flour
- Egg wash: 1 egg whisked together with 1 Tbsp water
Instructions:
- In a small bowl, dissolve the yeast in the 1/2 cup very warm water. Set aside and let it do it’s thing!
- In your mixer bowl, add the 2 cups of hot water, sugar, salt, canola oil and bread flour. Stir together till combined. Add the yeast mixture and stir it all together.
- Place the mixer bowl on the mixer with the hook attachment and add the AP flour 1 cup at a time until the dough comes together and is smooth and not too sticky. (You don’t have to use the full four cups though in my climate in Utah, I usually do – the dough should not stick to your hands, but it will feel a little tacky.)
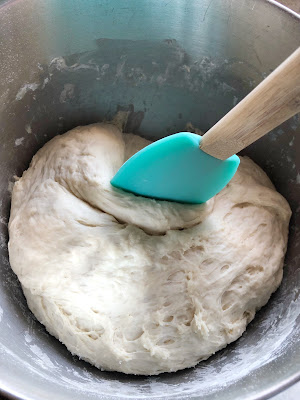
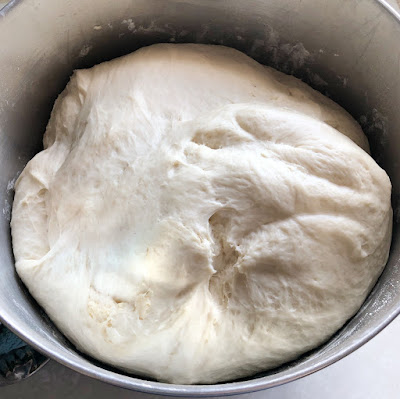
- Cover with a clean towel and and let sit in a warm place for an hour, using a spatula to scrape down the sides and flip it over to deflate the rise every ten minutes.
- After an hour, turn the dough out onto a well floured surface. Divide the dough in to four equal pieces.
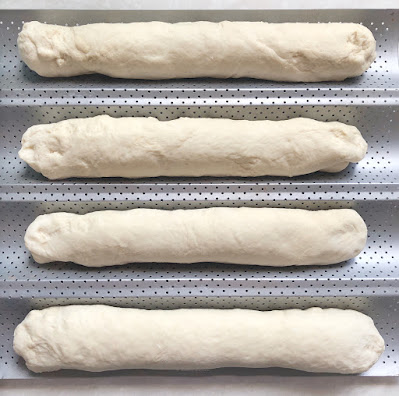
- For each section of dough: Sprinkle a little flour on it as needed to stop it from sticking to anything. Gently roll out into a rectangle, (mine were about 10×4). Roll along the long side as if you were making cinnamon rolls. Pinch the ends closed, shape the loaves and place each loaf on your pan.
- Score each loaf with a sharp knife 4-5 times, cover with a towel and let rise in a warm place for another 20-30 mins.
- Preheat the oven to 375 with 1 rack placed in the bottom position and 1 rack in the middle position. Place a spare baking sheet on the bottom rack.
- Brush the loaves with the egg wash and place the pan on the middle rack.
- Throw 4-5 ice cubes on the spare baking sheet on the bottom rack and close the oven door immediately.
- Bake at 375 for 25-30 mins or until golden brown.
- Remove from the oven and brush with melted butter immediately. Cool and serve!

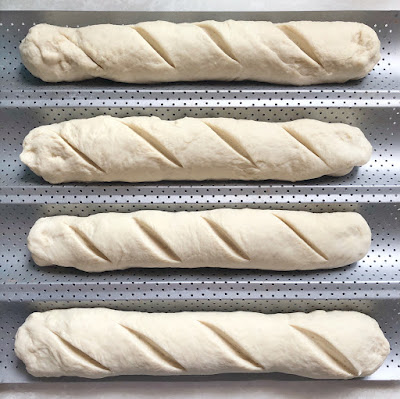
Let rise another 30 minutes before baking.
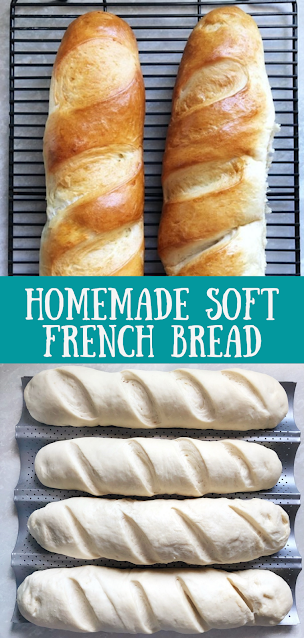

Easy French Bread Baguettes
EQUIPMENT (Amazon Associate Links)
Ingredients
- 1/2 cup very warm water
- 2 Tbsp instant yeast
- 2 cups hot water
- 3 Tbsp sugar
- 1 Tbsp salt
- 5 Tbsp canola oil
- 2 cups bread flour
- 3-1/2 to 4 cups AP flour
- Egg wash: 1 egg whisked together with 1 Tbsp water
Instructions
- In a small bowl, dissolve the yeast in the 1/2 cup very warm water. Set aside and let it do it’s thing!
- In your mixer bowl, add the 2 cups of hot water, sugar, salt, canola oil and bread flour. Stir together till combined. Add the yeast mixture and stir it all together.
- Place the mixer bowl on the mixer with the hook attachment and add the AP flour 1 cup at a time until the dough comes together and is smooth and not too sticky. (You don’t have to use the full four cups though in my climate in Utah, I usually do – the dough should not stick to your hands, but it will feel a little tacky.)
- Cover with a clean towel and and let sit in a warm place for an hour, using a spatula to scrape down the sides and flip it over to deflate the rise every ten minutes.
- After an hour, turn the dough out onto a well floured surface. Divide the dough in to four equal pieces.
- For each section of dough: Sprinkle a little flour on it as needed to stop it from sticking to anything. Gently roll out into a rectangle, (mine were about 10×4). Roll along the long side as if you were making cinnamon rolls. Pinch the ends closed, shape the loaves and place each loaf on your pan.
- Score each loaf with a sharp knife 4-5 times, cover with a towel and let rise in a warm place for another 20-30 mins.
- Preheat the oven to 375 with 1 rack placed in the bottom position and 1 rack in the middle position. Place a spare baking sheet on the bottom rack.
- Brush the loaves with the egg wash and place the pan on the middle rack.
- Throw 4-5 ice cubes on the spare baking sheet on the bottom rack and close the oven door immediately.
- Bake at 375 for 25-30 mins or until golden brown.
- Remove from the oven and brush with melted butter immediately. Cool and serve!





OMG !!! I made this and it was amazing everyone loved it . We sliced and made bruschetta it was delicious, with balsamic glacé drizzled on top! Yum!!
Ah, thank you so much for letting me know – this makes my day. So glad you liked it! 🙂
Just came out of the oven! Fantastic!! Going to take 2 of the loaves to wrap and freeze. Think they’ll do okay?
I have never had any left to freeze lol, but i would think they should do just fine!
First time making bread. What a great recipe! Turned out amazing!
I’m so glad you liked it! Thank you for sharing!
This has become my go-to recipe for bread when I need it made quick! Awesome recipe!!
Ah, that makes me so happy! Thank you so much! 🙂
This is a great all around dough.
I have made bread, pretzels, bagles, English muffins and anything else I can think of.
The only question I have would be the nutrition what are the calories?
I just purchased software to calculate this, so the nutrition info will be added to the recipe card soon! (Hobby blogger, not money making blogger, so baby steps :)) I’m so glad you love this dough and love that you are using it for other things. Thank you for commenting and rating – it makes my day every time. 🙂
Hi, can I used vegetable pil instead of canola? TIA
Hi Ruth! Absolutely you can use vegetable oil instead of canola! 🙂
Or melted butter. 😊
Can I use all ap flour instead of bread flour?
Yes you can – it won’t be quite as “chewy” texture wise, but will still give you French loaves. I’ve used both. 🙂
Can I use all sprouted wheat flour either alone or with the bread flour? Thank you!
I have actually never tried this recipe with any wheat flour, but let me know how it turns out if you give it a try!
I’ve used this recipe before in baguette form and it was amazing. But could I bake these into regular sized loafs of bread instead?
I have never made this in regular bread pans because it’s a very crusty bread. Have you tried my recipe for Honey White Bread? That one is way better suited for bread pans in my opinion with a bit of a softer crust! The Best Honey White Bread
This recipe is to die for. My husband and I finished off 3 loaves in 4 days. I have one loaf to my parents and they’re already requesting more. Thank you so much for sharing.
Thank you so much, these kinds of messages make my day! I’m so glad you like it. 💙
My bottom crust was so soft any recommendations to make it crispy
Did you use a dark or light pan to bake it in, or the bread pan? If you used a baking sheet, try using a darker pan, and make sure your oven is good and hot before putting the dough in to bake? Also, did you use the ice trick? That will help the entire loaf be crispier. 🙂
I’m not sure if I made a combination of bad choices with mine, but I used olive oil, all purpose flour only, don’t own baguette pans, and had my oven set to 350° as it tends to run hot, the tops very gorgeous but the bottom of each loaf was charcoal 💔 I look forward to trying again but sticking to your recipe!
I used all purpose flower and used sunflower oil instead. I would double check if the temperature you’re getting is accurate with a thermometer. Also was the baking pan dark and did you use parchment paper?
Wanted to see if there may have been another reason and thought this link might help.
https://breadtopia.com/faq/preventing-burnt-bread-bottom/
This is my go to bread when I didn’t feed my sourdough starter. My family loves it! I will also add things like jalapeños and cheese or rosemary.
Love it! I have been making a jalapeno asiago which i will post soon – so many different combinations, and just easy to make! 🙂
Loved this recipe! Easy to follow instructions. Thank you so much!
Thank you so much and thank you for rating and commenting! 🙂
Haven’t tasted them yet as they are cooling, but WOW. I laughed and told my husband I reached peek human because these loaves are just so beautiful and perfect looking. They smell incredible. Thank you for sharing such a straightforward, quick and mess-free recipe for some bussin’ bread. I cannot wait to remake for hosting Christmas Day!
*Note: (I personally ended up using about 4.5 cups of AP flour if this helps anyone out with stickiness.)
Ah, I am so happy they turned out! 🙂 Thank you for commenting and rating! It always makes my day. 🙂
This is now my go to bread. I love it – can I make the dough ahead and keep. We don’t always eat it all and it’s so lovely I hate to waste? Thanks for developing this recipe – you are a star
Thank you so much for the lovely comments and rating! If you hit the jump to recipe button and look at the ingredients line, you will see the option to hit a box that says “0.5” – this will change the measurements for you so you can do half a recipe! (That will give you two loaves.) Alternatively, we have frozen a baked loaf if we don’t get through it – freezing the dough is is a little more complicated and it will only last for about 24 hours in the refrigerator.
Absolutely delicious!!!! Only my second time making bread and second recipe! I tweaked it to 1 Tablespoon of Sugar instead of 3, skipped the egg wash and just covered with melted butter at the end. So delicious and perfect!!! Everyone is so happy with it!
SO glad you liked it! Thanks for sharing and commenting! 🙂
I am new to baking and have steered clear because i always fail, my mom even told me i should not have started on such am advanced type of bread….i have nailed this both times and everyone loves it!!! It has become my replacement to the store loaves and feeds our family for 4 meals
Oh my heavens this makes me so happy – Thank you so much for sharing – you made my day. 🙂
Looking over the recipe have a couple of questions:
Have a smaller family so guess I can halve the recipe for (2) loaves
Any thoughts on substituting a starter for the yeast?
If you use the “jump to recipe” button it will take you to a printable recipe card – on the “Ingredients” line you will see an option to half the recipe. I have never used any kind of starter for the yeast, so I’m not sure how that will turn out, but let me know if you try. 🙂
Hi! I’m a bit confused by your ingredients—is it 2 cups of bread flour and 3.1-4 cups AP flour or either or? I’m wanting to make this for a potluck tonight and want to make sure I get it right:) Thank you!!
So sorry, I have been out of town this past week. It’s 2 cups of bread flour then 3.5 to 4 cups of AP flour. You add enough flour for the dough to form, then stop. You might not need the whole 4 cups!
Can I cook this in a loaf pan?
I don’t recommend this recipe for a loaf pan as it’s not measured for that – try this one instead: https://donuts2crumpets.com/2022/09/the-best-honey-white-bread.html
The bread turned out super yummy and the directions were easy to follow!
I’m so glad you liked it. Thank you for commenting and rating! 🙂
Absolutely amazing recipe!!! I’m so happy & excited to find such an easy, chewy loaf that doesn’t involve 2 days of rise time a’la sourdough 😊 This recipe is truly fantastic!! I made 3 loaves rather than 4 — as my baguette pan only held 3 — and baked an extra 6 minutes to account for slightly larger loaves! Skipped the melted butter at the end so that they could be frozen — but otherwise, made exactly as written!! I couldn’t be happier!! Thank you!!
This makes me so happy to hear! Thank you so much for commenting and rating. It makes my day! 🙂
Hi! I am wanting to make this recipe but I live in high altitude (almost 6,000 ft). Do I need to tweak the recipe at all? TIA!
I live at about 5000, so you should be ok – just keep an eye on the dough when you are mixing and add enough flour to bring it together so it’s not sticking to your fingers but feels slightly tacky to the touch. 🙂
Thank you! I have a couple of questions. After the hour of rising when you turn it over onto a floured surface, how are you getting your rolled sections so neat? Mine look far more textured than yours and also when I go to score them, it is difficult and looks nothing like your perfectly scored lines. My rolls are pretty sticky so I add flour as I go but mine look like a hot mess compared to your pictures. They are currently baking so hopefully they turn out good but it seems to be this way for me every time I bake any type of bread.
Try kneading the dough a bit after you empty it on to the floured surface and it should come together smoothly before separating in to four pieces. If it is sticky, use well floured hands and sprinkle a little extra on top of the dough before kneading. That should make it easier to work with so you are not trying to shape sticky dough. It’s a fine balance between adding enough flour and too much. Before it rises you want the dough to feel tacky to the touch but not stick to your fingers when you poke it. Let me know how it turns out for you!
not my first time making bread but definitely my first time succeeding with such amazing flavor ! this is my all time favorite recipe. thank you for this! today my family requested jalapeño and cheddar to be put in the dough so we will see how that goes!!
I’m so happy to hear this! Thank you for commenting and rating! 🙂
Can I use traditional yeast instead ?
You can absolutely use dry active – just make sure to bloom it in water. (Instant does not require this step but I do it every time to make sure my yeast is good.)