
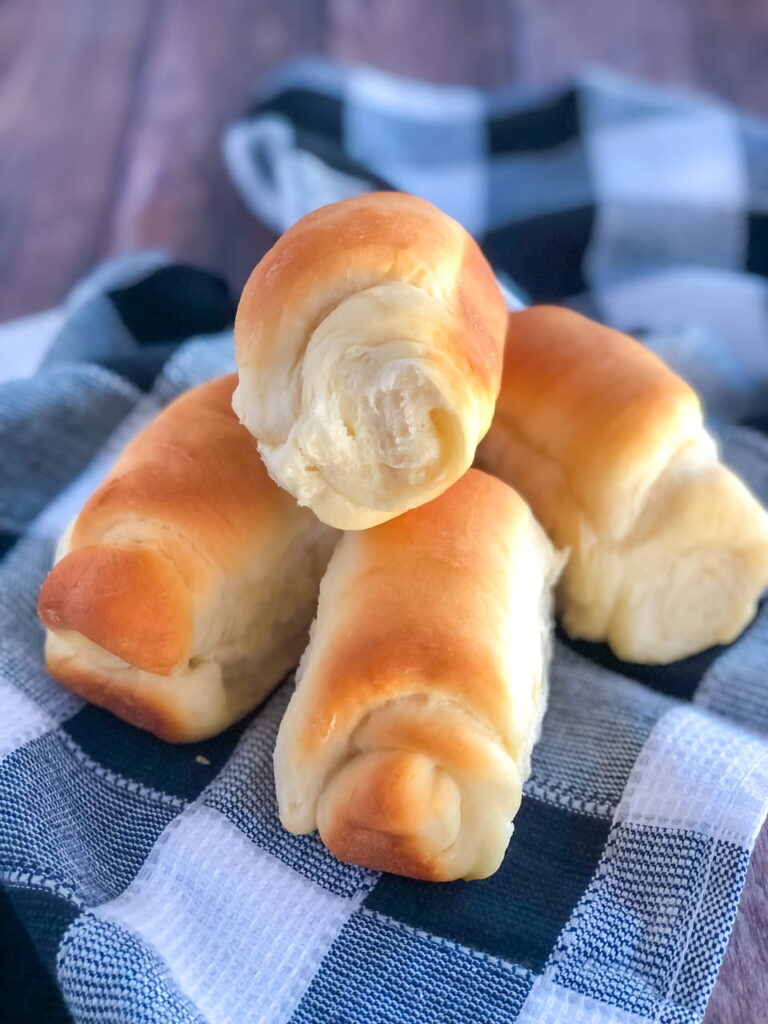
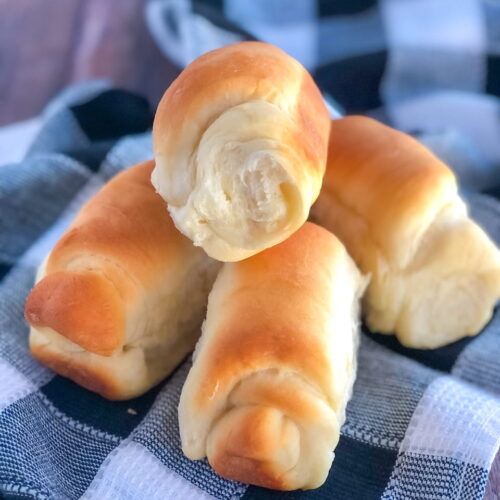
I had never attempted to make bread from scratch before I moved to Utah. To be honest, making bread seemed a little scary to me and way time consuming and my thought was “why on earth would I make bread or rolls when I can just run over to the store and bring some home from there?!?!” Well after going to several homes for dinner where the rolls were MADE instead of BOUGHT, I began to see why someone would put extra effort in to making them. There is probably nothing better than a homemade roll fresh out of the oven with butter and jam and these traditional Lion House Dinner Rolls are my favorite rolls for any holiday meal.
The actual making of the rolls is extremely therapeutic for me! There is something about being in the kitchen rolling and cutting and inhaling the heavenly sent of the dough or the rolls in the oven that just makes me happy. I have tried many recipes, but my absolute favorite rolls to make are these Lion House Rolls and I think it may have something to do with the way you cut and flip them. Take a look at this fantastic video of the Lion House Head Baker showing you how to do it just like they do:
Before watching this video, cutting and shaping rolls was the hardest part of the process to me… but I LOVE how you can just roll one big rectangle and then cut it up in to little rectangles and not have any waste or have to re-roll or anything. And the whole flipping thing??? Well it’s just plain fun!!! The perfect activity to help get the kids involved! These rolls are seriously famous here in Utah. You can buy them at some Deseret Book stores and The Lion House Pantry itself, but Lion House has also generously shared this recipe so anyone can make them at home!
A couple of tips for this recipe:
- If you would like to make the dough the day before to help cut down on the work you do on Christmas or Thanksgiving, you can make the dough, let it do it’s first rise, cut, shape and place on the baking tray, then before the second rise, cover the rolls with saran wrap and place the tray in the refrigerator for up to 18 hours. When ready to bake, remove the tray of rolls from the refrigerator and place on the counter or in a warm place for 1 hour, then bake as directed.
- I like to use a bread whisk when whisking together the first set of ingredients for my bread. It combines everything beautifully, but cleans easily and you don’t have clumps stuck inside the whisk like you do with a regular whisk!
Ingredients:
- 2 cups very warm water
- 2/3 cup instant nonfat dry milk
- 2 Tbsp dry instant yeast
- 1/4 cup sugar
- 2 tsp salt
- 1/3 cup shortening, butter or margarine (I put mine in the microwave for 15 secs to soften it)
- 1 egg, lightly whisked
- 5 to 5-1/2 cups AP flour
Instructions:
(Note: I use my Kitchen Aid mixer for this recipe and it works perfectly, but you can knead by hand if you want to. It will just take a little longer.)
- In your large mixer bowl, combine the water and the milk powder and stir until the milk dissolves.
- Add the yeast to the mixture and let proof for a minute or two.
- Add the sugar, salt, shortening, egg and 2 cups of the flour to the yeast mixture. Whisk everything together well.
- Place the bowl on the mixer with the dough hook, and add 2 more cups of flour then mix on low speed for 2-3 minutes.
- Add another 1 cup of flour and mix again.
- If needed, add the remaining 1/2 of a cup of flour. The dough should be soft, not overly sticky, and not stiff. (It is not necessary to use the entire amount of flour. The softer the dough, the lighter the roll.)
- Scrape the dough off the sides of the bowl and move the dough around as you spray non-stick spray around the sides of the bowl. Spray the dough with the oil too. (This helps prevent the dough from drying out.)
- Cover with plastic wrap and/or a cotton towel and allow to rise in a warm place until double in size, about an hour. (I preheat my oven to just about 100 degrees then turn it off and let the dough sit in there for an hour.)
- After the dough has risen, sprinkle a pastry mat or your counter with flour and scrape the dough out on to the prepared surface.
- Roll the dough in to a large rectangle. (For 3 rows of 8 make your rectangle about 20×12.)
- Brush melted butter over the entire dough rectangle, then cut your rolls 2-1/2 inches by 4 inches, using a pizza cutter and your fingers as guides as she shows you in the video.
- Flip the rolls with the butter on the inside and place the rolls on a greased baking pan, spacing them equally apart doing 6 rolls on the long side x 4 rolls on the short.
- Optional: If you are making these the day before, you can now cover the rolls with saran wrap and place the tray in the refrigerator for up to 18 hours. When ready to bake, remove from the refrigerator, let rise for one hour, then skip to instruction 15.
- Cover loosely with a clean towel and let rise in a warm place until the rolls are double in size (approx. 30 minutes.)
- When ready to bake, preheat the oven to 375.
- Remove the cover from the rolls and bake at 375 for 15-20 minutes or until they are browned to your satisfaction. Remove from the oven and immediately brush with melted butter. (Yields about 2 dozen rolls.)


Lion House Dinner Rolls
EQUIPMENT (Amazon Associate Links)
Ingredients
- 2 cups very warm water
- 2/3 cup instant nonfat dry milk
- 2 Tbsp dry instant yeast
- 1/4 cup sugar
- 2 tsp salt
- 1/3 cup shortening, butter or margarine (I put mine in the microwave for 15 secs to soften it)
- 1 egg, lightly whisked
- 5 to 5-1/2 cups AP flour
Instructions
- In your large mixer bowl, combine the water and the milk powder and stir until the milk dissolves.
- Add the yeast to the mixture and let proof for a minute or two.
- Add the sugar, salt, shortening, egg and 2 cups of the flour to the yeast mixture. Whisk everything together well.
- Place the bowl on the mixer with the dough hook, and add 2 more cups of flour then mix on low speed for 2-3 minutes.
- Add another 1 cup of flour and mix again.
- If needed, add the remaining 1/2 of a cup of flour – The dough should be soft, not overly sticky, and not stiff. (It is not necessary to use the entire amount of flour. The softer the dough, the lighter the roll.)
- Scrape the dough off the sides of the bowl and move the dough around as you spray non-stick spray around the sides of the bowl. Spray the dough with the oil too. (This helps prevent the dough from drying out.)
- Cover with plastic wrap and/or a cotton towel and allow to rise in a warm place until double in size, about an hour. (I preheat my oven to just about 100 degrees then turn it off and let the dough sit in there for an hour.)
- After the dough has risen, sprinkle a pastry mat or your counter with flour and scrape the dough out on to the prepared surface.
- Roll the dough in to a large rectangle. (For 3 rows of 8 make your rectangle about 20×12.)
- Brush melted butter over the entire dough rectangle, then cut your rolls 2-1/2 inches by 4 inches, using a pizza cutter and your fingers as guides as she shows you in the video.
- Flip the rolls with the butter on the inside and place the rolls on a greased baking pan, spacing them equally apart doing 6 rolls on the long side x 4 rolls on the short.
- Optional: If you are making these the day before, you can now cover the rolls with saran wrap and place the tray in the refrigerator for up to 18 hours. When ready to bake, remove from the refrigerator, let rise for one hour, then skip to instruction 15.
- Cover loosely with a clean towel and let rise in a warm place until the rolls are double in size (approx. 30 minutes.)
- When ready to bake, preheat the oven to 375.
- Remove the cover from the rolls and bake at 375 for 15-20 minutes or until they are browned to your satisfaction. Remove from the oven and immediately brush with melted butter. (Yields about 2 dozen rolls.)

0 Comments