
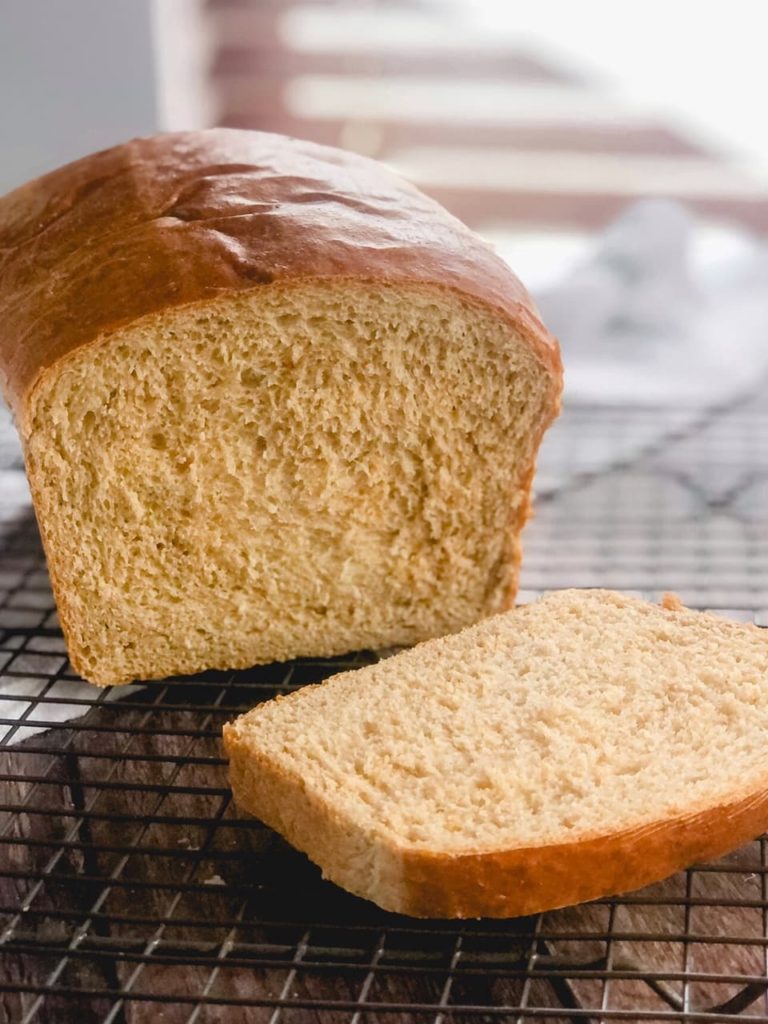
Is there anything better than the smell of fresh bread baking in the house? It’s so comforting and soothing. It was an especially busy week this week and I needed a baking therapy session. Since it was bread week on The Great British Baking Show, I decided to make my favorite simple honey wheat bread recipe.
I will admit I’m not the biggest fan of 100% whole wheat bread, so this recipe uses about half whole wheat flour, half bread or all purpose flour. (It appeases even my most fussy family members that way.) Using bread flour gives your loaf a little more structure and chewiness, but you can absolutely use AP in a pinch.
A couple of tips for this bread recipe:
- You can make this with all wheat flour or all white flour if you choose to! However, the combination of honey, wheat flour and bread flour produce a lovely loaf with a little bit of zingy sweetness that elevates the breads yeasty flavor.
- This bread recipe uses shortening which means that you can make it with simple pantry ingredients any time! However, you can substitute softened butter for the shortening if you would like to.
- If you don’t have milk on hand, you can absolutely substitute warm water making this a great pantry staple bread – milk just helps it rise more, gives it a softer crumb and a browner crust! I have made this bread with milk and also with just water and both turned out delicious!
This recipe makes two big loaves in 9×5 inch loaf pans.
Ingredients:
- 2 cups warm milk (about 110-115 degrees)
- 1-1/2 Tbsp instant yeast
- 1 tsp sugar
- 1/2 cup warm water
- 2-1/2 cups whole wheat flour
- 3 to 3-1/2 cups bread flour or all purpose flour (start with 3 and add more as needed)
- 3 Tbsp shortening (I like butter flavored)
- 1/4 cup honey
- 1 Tbsp salt
- Egg wash: 1 egg whisked with 1 Tbsp water
Instructions:
- Put the warm milk in your mixer bowl and sprinkle the yeast and sugar over it. Mix together and let sit for 5 minutes to make sure the yeast activates and gets foamy.
- Add the water, whole wheat flour, 3 cups of the bread flour, shortening, honey, and salt.
- Let the mixer knead on low speed for 2 minutes with the dough hook attachment, scraping down as needed. Add small amounts of bread flour, up to another half a cup, until the dough is the right consistency, (you want a soft dough that is easy to work with, but you want it to feel tacky, but not stick to your fingers. You do NOT need to use the whole additional amount.) Continue to let the mixer knead for another 2 minutes when it is the right consistency.
- Scrape the dough in to a ball in your bowl, cover the bowl with plastic wrap and a clean towel and set in a warm place to rise for 1 hour or until it has doubled in size. (I turn the oven on at the lowest temperature for just 1 minute, then turn it off and put the mixing bowl in there.)
- Turn the dough out on to a lightly floured pastry mat or counter, and knead for a minute, then divide the dough in two equal portions.
- Roll out each piece of dough just slightly then fold over in thirds, (pressing together with the heel of your hand), tuck in the ends, and place the bread with seams down in two lightly greased 9×5 bread pans.
- Cover the pans lightly with plastic wrap and let the loaves rise another 30 minutes.
- When ready to bake, preheat oven to 350.
- Remove plastic wrap, brush the loaves gently with egg wash, then bake the loaves at 350 for about 30 minutes. (Bread should register 190 degrees with an instant read thermometer to be fully baked, but not overbaked.
- Optional: gently brush some melted butter on the top of each loaf as soon as it comes out for a softer crust.
- Remove from the oven and let cool 10 minutes before popping the loaves out of the pans on to a cooling rack.
- Bread should cool for a minimum of 30 minutes before slicing with a serrated knife!


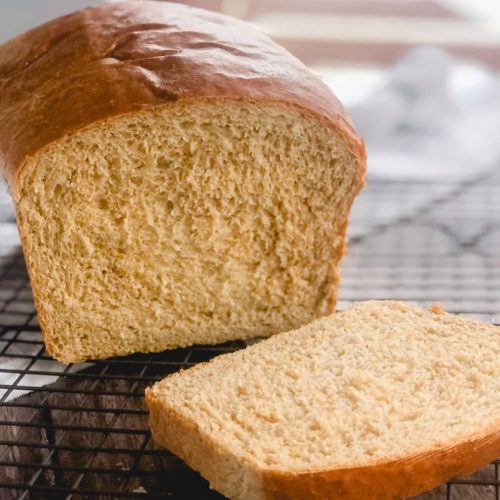
Simple Honey Wheat Bread
Honey Wheat bread recipe made with half whole wheat flour, half bread flour and a few other simple pantry ingredients for fresh baked bread any time!
EQUIPMENT (Amazon Associate Links)
Ingredients
- 2 cups warm milk (about 110-115 degrees)
- 1-1/2 Tbsp instant yeast
- 1 tsp sugar
- 1/2 cup warm water
- 2-1/2 cups whole wheat flour
- 3 to 3-1/2 cups bread flour or all purpose flour (start with 3 and add more as needed)
- 3 Tbsp shortening (I like butter flavored)
- 1/4 cup honey
- 1 Tbsp salt
- Egg wash: 1 egg whisked with 1 Tbsp water
Instructions
- Put the warm milk in your mixer bowl and sprinkle the yeast and sugar over it. Mix together and let sit for 5 minutes to make sure the yeast activates and gets foamy.
- Add the water, whole wheat flour, 3 cups of the bread flour, shortening, honey, and salt.
- Let the mixer knead on low speed for 2 minutes with the dough hook attachment, scraping down as needed. Add small amounts of bread flour, up to another half a cup, until the dough is the right consistency, (you want a soft dough that is easy to work with, but you want it to feel tacky, but not stick to your fingers. You do NOT need to use the whole additional amount.) Continue to let the mixer knead for another 2 minutes when it is the right consistency.
- Scrape the dough in to a ball in your bowl, cover the bowl with plastic wrap and a clean towel and set in a warm place to rise for 1 hour or until it has doubled in size. (I turn the oven on at the lowest temperature for just 1 minute, then turn it off and put the mixing bowl in there.)
- Turn the dough out on to a lightly floured pastry mat or counter, and knead for a minute, then divide the dough in two equal portions.
- Roll out each piece of dough just slightly then fold over in thirds, (pressing together with the heel of your hand), tuck in the ends, and place the bread with seams down in two lightly greased 9×5 bread pans.
- Cover the pans lightly with plastic wrap and let the loaves rise another 30 minutes.
- When ready to bake, preheat oven to 350.
- Remove plastic wrap, brush the loaves gently with egg wash, then bake the loaves at 350 for about 30 minutes. (Bread should register 190 degrees with an instant read thermometer to be fully baked, but not overbaked.
- Optional: gently brush some melted butter on the top of each loaf as soon as it comes out for a softer crust.
- Remove from the oven and let cool 10 minutes before popping the loaves out of the pans on to a cooling rack.
- Bread should cool for a minimum of 30 minutes before slicing!
Notes
A couple of tips for this bread recipe:
- You can make this with all wheat flour or all white flour if you choose to! However, the combination of honey, wheat flour and bread flour produce a lovely loaf with a little bit of zingy sweetness that elevates the breads yeasty flavor.
- This bread recipe uses shortening which means that you can make it with simple pantry ingredients any time! However, you can substitute softened butter for the shortening if you would like to.
- If you don’t have milk on hand, you can absolutely substitute warm water making this a great pantry staple bread – milk just helps it rise more, gives it a softer crumb and a browner crust! I have made this bread with milk and also with just water and both turned out delicious!


I only have one loaf pan, could I wrap half of the dough and put it in the fridge after dividing?
Yes you can absolutely do that – just wrap in plastic wrap, then when you are ready to bake, remove from the refrigerator and let sit on the counter for about 20-40 minutes before shaping and doing the second rise in the pan before baking!
I am so happy with this recipe. My loaves turned out beautifully! They taste amazing, they are like the perfect sandwich bread. Your recipe is going on my recipe box! It’s a keeper!
Thank you so much for sharing.
These turned out so beautiful and so stinking easy! I just made 6 loaves today!!!!!
This makes me so happy to hear! Thank you so much for commenting and rating! It truly makes my day. 🙂
I cut the recipe in half in case I wasn’t happy with the result but turns out this is a great recipe and I’ll be making it again and again…
Thank you for sharing
I’m so happy to hear that! Thank you so much for commenting and rating. It makes my day every time. 🙂
Confused about the flour measurements compared to the recipe? 1.5-1.5 .15 start with 3cups?
Yes, you use all of the whole wheat, but just 3 cups of the bread/AP flour to start. Once you have the dough starting to form, you can add additional bread/AP flour as needed based on your climate or elevation. How much flour you need can vary depending on weather, altitude, and temperature of your kitchen, so just add the remaining by small amounts, until it feels right. It should be tacky to the touch, but shouldn’t stick to your fingers when it is done! Let me know if you have more questions!
Cut the recipe in half and the bread was divine! Thank you for a delicious wheat bread recipe.
I am so happy to hear that! Thank you for commenting and rating! 🙂
I am making this right now, I just put it in the oven and my house smells DELICIOUS already! I usually make sourdough bread, but my son can’t eat it,(teeth issues) I actually spent all day baking, 1st sourdough, then I came upon this recipe! So, I got up, and started baking, again! I have a feeling this will be a staple in our house from now on! 🍞🥪🍔🍕☕ THANK YOU FOR SHARING THIS ♥️♥️♥️
How can I adapt the recipe if I have rapid rise or instant rise yeast?
Thank you
I use instant yeast all the time with no adaptations. 🙂
Made this bread with wheat flour and bread flour but I omitted the egg wash
Turned out beautifully
I’m so glad you liked it! Thank you for sharing your success! 💕
Although I have not actually baked the bread nor tasted it…I needed to leave a comment that says “Thank You” for not adding 15 swipes of your step by step baking process. I am just about over people that make 1 recipe into a cook book!! Your was simple to follow and straight to the point. One thing I would suggest is that I have seen just recently where authors put the measurements into the directions (where appropriate). I hope this makes sense but what it does is eliminate the reader having to go back to the ingredients list to get the measurements. Back and forth….eliminates that.
Do you know the nutritional value of this bread?
Hi Rachel, I do not, but there are sites online where you can enter the recipe and it will give you that information if you want it!
Hi, can I freeze the dough for later use?
You can, but I don’t really recommend it as there are a lot of steps for making sure it comes out right. If you want to try freezing it, you will need to do it after the first rise is completed and you have formed it in to loaves. You would need to freeze it in the loaf pans, so cover with both saran wrap and foil so there is a tight seal. After 12 hours you can remove from the loaf pans and store in a freezer bag until you are ready to bake. When you are are ready to bake, put the frozen dough back in the loaf pan, let it sit and defrost overnight in the refrigerator, then put it on the counter until the dough has done it’s second rise. (It may take longer – allow for up to 2 hours – it needs to be soft, puffy and about double in size from when you took it out of the freezer. You can then bake!
I don’t have a large stand mixer. 🫤. How would I adapt this to just using a hand mixer and kneading by hand? Thanks!
I would also like the answer to this question please
I would also like the answer to this question please. Thank you
If you hand knead, it will need to be kneaded for 10-15 minutes. 🙂
can we place the dough in a bread maker?
I have never tried this in a bread maker, so I’m not sure the measurements would work!
Okay, remember in October how I said it was so easy? Well, it truly is an amazing and easy recipe. EXCEPT if you are highly distracted and misread the directions. I didn’t let it do the initial 1 hour rise and skipped to the split and rise step. I’m hoping it will be okay, I’m letting it rise in my pan for an hour. But, I am so bummed! I’ll reply to this with updates when I bake and slice in the morning🤞🏻🤞🏻🤞🏻
Oops, sorry! I didn’t mean to post here
Have you frozen the 2nd loaf before? Our bread intake ebbs and flows. Lol. This is my absolute favorite bread recipe! Thank you so much for sharing!
Ah this makes me so happy! Yes, you can definitely freeze the second loaf. Wrap in foil, then place in a freezer bag. (You will have to cut it in half to fit in a freezer bag or slice it up.) I also have a button on the recipe card that will just cut the recipe in half for you if you just want to make one at a time. Just hit the “jump” button, which takes you to the recipe card, then on the “Ingredients” line of the recipe, you will see where you can half the recipe! 🙂
This is a lovely recipe. Was out of instant yeast so I substituted for active dry increasing to 2 T and it worked great! Used half the dough for a sandwich loaf and used the other half to make cinnamon rolls. This will be my go-to recipe for bread!
Ah, thank you so much for commenting and rating – it makes my day when that happens. I’m so glad you like it! 🙂
Delicious and simple!
Ahhh, I’m so glad you liked it! Thank you for commenting and rating. 🙂
Currently in my oven! Can I store it in my pantry? How long is it good for?
Thank you
Yes, we store it plastic baggies (once it’s cooled.) I’m honestly not sure how long it lasts, ours is always gone within a day or two! But you should be good for at least 3 days.
Sorry if this is a duplicate comment. I wasn’t sure my first on went through.
I don’t have a stand mixer. Would this be doable with a hand mixer and kneading by hand?
Hi Becky – I would not use the hand mixer, once you get to adding the flour, you can use your hands or a bread whisk or a flat whisk to mix it in and then knead for about 10 minutes until the dough is nice and elastic. Let me know how it goes! 🙂
Hi! I am a beginner at making bread. Will it be possible for you to add pictures of how to fold the dough? I am not sure I am doing this right. My bread did not come out correctly. I think It was not folded correctly, so it did not rise. It was a very sad bread. 🙂 I like the recipe it seems very easy for a beginner baker like me. 🙂 Thank You Joanna
Can you use butter or Beef Tallow instead of shortening? We don’t use shortening in our home.
I’ve never tried beef tallow, but have used butter, margarine, canola oil and olive oil – all worked just fine! 🙂
Just made this and WOW I am speechless. So light and fluffy, so incredibly easy! I don’t have a stand mixer, so I kneaded by hand. It’s a bit sticky, and I had to add more flour than the recipe initially called for, but not much more. Can’t wait to serve this tonight with some whipped honey butter!
I’m so glad you like it! Wow – I’m always impressed with hand kneading! Thank you for commenting and rating, it always makes my day. 🙂
Is there altitude steps/adjustments for this recipie? It looks so yummy! I’m in Denver.
I’m in Utah, so you should be good – the main adjustment is the flour which I include a “range” of flour to add depending on where you live and have included a note about just adding enough so it is tacky to the touch but doesn’t stick to your fingers – let me know how it turns out! 🙂
Very simple and fun to make with the kids when I don’t have a lot of time. Great recipe and easy to follow! Thank you
Ah that makes me so happy to hear! Thank you for commenting and rating! 🙂
I halved the recipe so l only made one loaf, now l wish l would have made two. Turned out awesome, gonna be my go to for the weekly bread making!
Thank you so much for commenting and rating June! Much appreciated!:)
If I want to used whole wheat bread flour does this change the amount of whole wheat regular flour used?
I’ve never tried it with whole wheat bread flour. All whole wheat will most likely make it much more dense and less light. If you do try it, just add two cups of the bread flour to start and then add a little more at a time and only add enough until it is tacky but doesn’t stick to your hands. Hope this helps!
Can you make this in a Pullman loaf pan?
I’ve never made it in a pullman loaf pan, I would think it would most likely be more dense as it would not allow the rise over the top of the pan.
Okay, remember in October how I said it was so easy? Well, it truly is an amazing and easy recipe. EXCEPT if you are highly distracted and misread the directions. I didn’t let it do the initial 1 hour rise and skipped to the split and rise step. I’m hoping it will be okay, I’m letting it rise in my pan for an hour. But, I am so bummed! I’ll reply to this with updates when I bake and slice in the morning🤞🏻🤞🏻🤞🏻
It still came out perfectly!!!!
Yay! I’m so glad to hear that!
Can you use 2% milk, or is whole milk better?
I have used 2% with complete success! 🙂
I have never been a wheat bread lover. Your bread is the exception. It’s truly delicious. Thank you for the easy recipe!
Wow, thank you for the compliment and the wonderful rating – it makes my day! 🙂
This bread turned out perfect! Toasted with honey butter is absolutely melt in your mouth!!
I’m so glad you like it! Thank you so much for commenting and rating! 🙂
This is the first loaf bread I’ve made. My 13 yo daughter is a swimmer and choosing to eat clean but needs a lot of healthy carbs for her workouts. Today is the second time I’ve made this. She eats it in the morning, after school and with dinner. And my 7 yo LOVES it too. Wants her sandwich every day made with this to take her lunch. Then she wants a slice after school just like her sister. It really is SO SO GOOD! When I’m cutting weight, a slice of this will fill me up for a long time. I don’t eat a ton of bread, so it’s a yummy treat! I highly recommend this recipe! Thanks for sharing it.
Ah, thank you so much for commenting and rating it makes my day, and I’m SO glad everyone likes it! 🙂
Do you know app where I can enter bread ingredients to get nutritional values?
I’m making this for my family, we have a member of family with Type1 Diabetes so we need to
Know how carbs in order to dose.
There are lots of websites that you can enter your recipes in to! If you just google “free recipe nutrition calculator” it will give you a list to choose from 🙂
This bread is really good. I use more wheat flour then white in mine. I have made this twice now and will be making it again.
I am so happy to hear that! Thank you so much for commenting and rating! 🙂
Hi,
I recently bought a bread machine. Do you know the instructions for using the bread machine?
I do not! Bread machines generally have specific recipes that are measured for their pan size!
This Honey Wheat bread recipe from donuts2crumpets is an absolute winner! It was incredibly easy to make, turned out moist, had just the right amount of sweetness from the honey. The texture is soft yet sturdy enough for sandwiches, making it a staple in my kitchen. A fantastic go-to recipe for homemade bread.
Wow – thank you so much for the glowing review! I appreciate the comment and the rating so much and am so glad you liked it! 🙂
I made mine into dinner rolls and a loaf. I also added more honey. Haven’t tried yet cause they just came out of the oven,but I’m sure they’re gonna be good.
Hi! Can I use King Arthur Golden Wheat flour instead of regular whole wheat flour? Thank you!
Yes you can!
Can you use buttermilk instead of whole milk?
I do not suggest subbing buttermilk as it has more acid and can affect your rise and bake. 🙂 That being said, I have not tried it, so if you do try, let me know how it turns out! 🙂
I made this bread today. I added a little extra honey. Oh my gosh!!! To die for. My favorite honey wheat bread. Definitely a keeper.
This makes me so happy! Thank you so much for commenting and rating – it truly makes my day! 🙂
Hello, I have always used a bread machine and it broke so I am going to try your recipe. Can I leave out the sugar? Do I need to make adjustments to the honey if I do? Thank you for your help!
You can definitely leave out the sugar, it’s just used to help the yeast, but it will be fine without it too 🙂 No need to make adjustments to the Honey. 🙂
Made it today. It’s the perfect sandwich bread I was looking for. I gave the second loaf to the neighbors and they ate it all in one sitting.
Ah this makes me so happy! Thank you for rating and commenting. It always makes my day. 🙂
I’m so so happy to hear this – thank you so much for commenting and rating, it always makes my day. 🙂
Recipe looks wonderful. Would like to know if I could use butter instead of shortening and would that affect the bread? Thank you.
You can absolutely use butter – I use that frequently and it’s delicious. 🙂