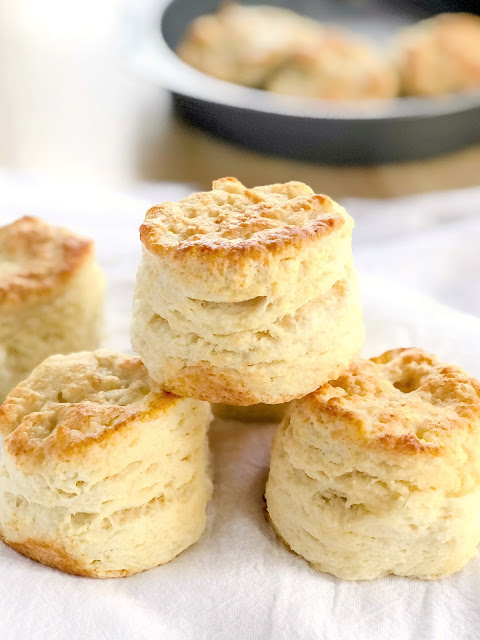
Have you ever made homemade buttermilk biscuits completely from scratch? For the longest time I was under the impression that biscuits were a time consuming, long, drawn out process that required my full attention for at least a couple of hours. What I have come to find is that they aren’t too complicated at all! In fact, they have just a handful of pantry ingredients and are actually quite quick and easy to throw together. These homemade buttermilk biscuits are beautifully buttery and bake up tall, soft and fluffy with a golden crispy top.
I love these tender, flakey biscuits smothered in sausage gravy, as part of a stacked breakfast sandwich with egg, cheese and bacon or sausage, or just on their own with butter or jam. Trust me, this is a fabulous recipe to have up your sleeve, and the more you make them, the quicker and easier they become!
Some tips for this recipe to help you be your best biscuit making self ever:
- Grating frozen butter is the best tip for biscuits. When you grate frozen butter you don’t have to try and get it in to pea sized pieces by hand. Over handling the dough can make the butter melt before you get the biscuits in to the oven.
- Keep butter in the freezer so you have it ready to grate any time you want to make biscuits. I keep at least two sticks of butter in my freezer at all times and replace them as I take them out.
- After you grate your butter, place the plate with the grated butter back in the freezer until you mix it in to your dry ingredients. You want to keep that butter frozen!
- Keep your buttermilk in the refrigerator until you are going to add it to the dry ingredients too. The colder the ingredients, the better.
- Make sure not to twist your biscuit cutter when you cut out the biscuits. If you twist you could stop them from being able to rise as high.
- Flour and liquid measurements can vary a little bit based on your climate, so if your dough seems like it won’t come together, sprinkle with a few drops of buttermilk. If it’s wet, sprinkle with a very little bit of flour.
- You can use whole milk if you don’t have buttermilk, but buttermilk helps gives them a nice little tang, helps them rise taller, and keeps them tender.
- You can use a baking sheet lined with parchment or silicone if you don’t have a cake pan. Just start from the middle and make sure they are touching each other! I like the cake pan because the sides help the biscuits to grow a bit more evenly. They have a tendency to turn out a little more lopsided on the baking sheet.
Ingredients:
- 1/2 cup butter, frozen
- 2-1/2 cups AP flour
- 1 Tbsp baking powder
- 1/2 tsp baking soda
- 1 Tbsp sugar
- 1/2 tsp salt
- 1 cup buttermilk
- 2 Tbsp melted butter to brush on the biscuits after baking.
Instructions:
- Preheat oven to 425. Line a 9″ round cake pan with sheet with parchment paper.
- Grate your frozen butter using a box grater then throw it back in the freezer until you need it.
- In a large bowl, whisk together the flour, baking powder, baking soda, sugar and salt.
- Add the frozen butter to the flour mixture and toss it all together using a fork.
- Make a well in the middle and add the buttermilk – stir using the fork just until it comes together.
- Empty the dough on to a lightly floured surface and bring it together with your hands to form it in to a rectangle.
- Sprinkle it with flour and roll it out to about 3/4 of an inch, then fold the dough in thirds on top of each other, and roll again – repeat 3-4 more times – this gives you the layers.
- Roll the dough down to a rectangle lightly until it is about an inch thick.
- Use a 3 inch biscuit cutter to cut out the biscuits – push it straight down and pull straight up, making sure you don’t twist the cutter.
- Once you have cut out as many as you can from the first , gently roll together all the leftover bits and continue to cut out biscuits until the dough is pretty much all gone – (I usually make 8 total and that fits the pan perfectly.)
- Place the biscuits on the pan, one in the middle and the others around it- they will be lightly touching each other.
- Place the whole pan in your freezer for 10 minutes to make sure those ingredients are still cold.
- Brush the tops of the biscuits with milk, buttermilk or cream.
- Bake at 425 for 14-16 minutes
- Remove from oven and brush with melted butter immediately then serve!
Biscuits are always best served same day, but if you have leftovers you can store in an airtight container until the next day and reheat for about 5 minutes in a 350 degree oven.
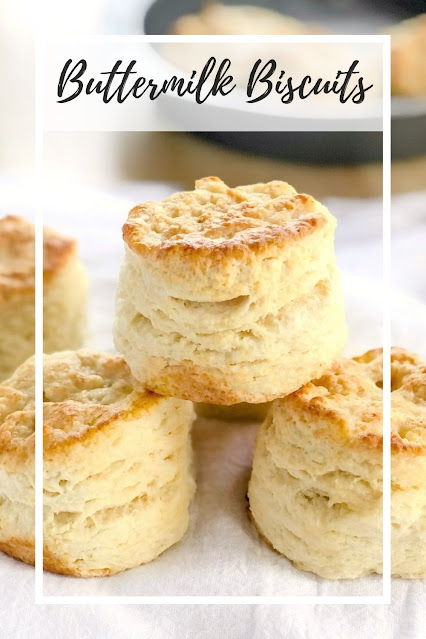

Easy Homemade Flakey Buttermilk Biscuits
EQUIPMENT (Amazon Associate Links)
Ingredients
- 1/2 cup butter, frozen and grated
- 2-1/2 cups AP flour
- 1 Tbsp baking powder
- 1/2 tsp baking soda
- 1 Tbsp sugar
- 1/2 tsp salt
- 1 cup buttermilk
- 2 Tbsp melted butter to brush on the biscuits after baking.
Instructions
- Preheat oven to 425. Line a 9″ round cake pan with sheet with parchment paper.
- Grate your frozen butter using a box grater then throw it back in the freezer until you need it.
- In a large bowl, whisk together the flour, baking powder, baking soda, sugar and salt.
- Add the frozen butter to the flour mixture and toss it all together using a fork.
- Make a well in the middle and add the buttermilk – stir using the fork just until it comes together.
- Empty the dough on to a lightly floured surface and bring it together with your hands to form it in to a rectangle.
- Sprinkle it with flour and roll it out to about 3/4 of an inch, then fold the dough in thirds on top of each other, and roll again – repeat 3-4 more times – this gives you the layers.
- Roll the dough down to a rectangle lightly until it is about an inch thick.
- Use a 3 inch biscuit cutter to cut out the biscuits – push it straight down and pull straight up, making sure you don’t twist the cutter.
- Once you have cut out as many as you can from the first , gently roll together all the leftover bits and continue to cut out biscuits until the dough is pretty much all gone – (I usually make 8 total and that fits the pan perfectly.)
- Place the biscuits on the pan, one in the middle and the others around it- they will be lightly touching each other.
- Place the whole pan in your freezer for 10 minutes to make sure those ingredients are still cold.
- Brush the tops of the biscuits with milk, buttermilk or cream.
- Bake at 425 for 14-16 minutes
- Remove from oven and brush with melted butter immediately then serve!
- Biscuits are always best served same day, but if you have leftovers you can store in an airtight container until the next day and reheat for about 5 minutes in a 350 degree oven.
Notes
- Grating frozen butter is the best tip for biscuits. When you grate frozen butter you don’t have to try and get it in to pea sized pieces by hand. Over handling the dough can make the butter melt before you get the biscuits in to the oven.
- Keep butter in the freezer so you have it ready to grate any time you want to make biscuits. I keep at least two sticks of butter in my freezer at all times and replace them as I take them out.
- After you grate your butter, place the plate with the grated butter back in the freezer until you mix it in to your dry ingredients. You want to keep that butter frozen!
- Keep your buttermilk in the refrigerator until you are going to add it to the dry ingredients too. The colder the ingredients, the better.
- Make sure not to twist your biscuit cutter when you cut out the biscuits. If you twist you could stop them from being able to rise as high.
- Flour and liquid measurements can vary a little bit based on your climate, so if your dough seems like it won’t come together, sprinkle with a few drops of buttermilk. If it’s wet, sprinkle with a very little bit of flour.
- You can use whole milk if you don’t have buttermilk, but buttermilk helps gives them a nice little tang, helps them rise taller, and keeps them tender.
- You can use a baking sheet lined with parchment or silicone if you don’t have a cake pan. Just start from the middle and make sure they are touching each other! I like the cake pan because the sides help the biscuits to grow a bit more evenly. They have a tendency to turn out a little more lopsided on the baking sheet.


Really great recipe. I recommend following the extra tips for delicious and perfectly flaky/soft biscuits. The only thing I changed was to add a bit of butter and flour to the bottom of the pan instead of parchment paper. The biscuits came out easily and were nice and crispy on the bottom.
Ah, this makes me so happy! Thank you so much for rating and commenting. It makes my day every time! 🙂
I couldn’t find my old recipe so I use this one. The mix is a little too dry and ended up having to add more buttermilk. I’ve been baking for years. I’m slightly disappointed. And it only gave me six full biscuits one three-quarter biscuit and a baby one that I can’t even really count as a biscuit.
I’m wondering how you measured your flour – I usually fluff with a fork, then gently scoop it in and level off with a knife. If it has too much flour it would be dry. Additionally, you can roll it a little thinner to get more biscuits. Thank you for commenting and your feedback!