
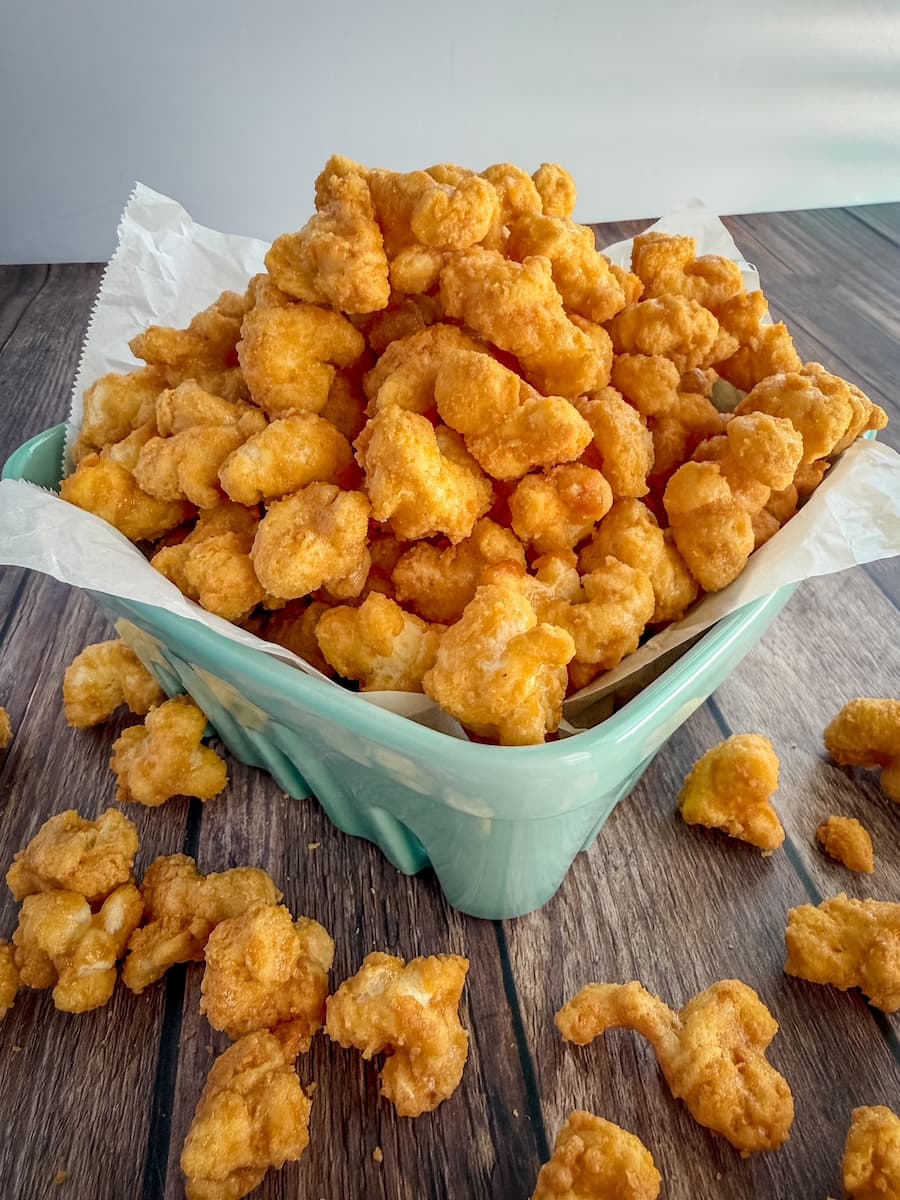
If you’ve never made Caramel Puff Corn before, you’re in for a treat! This recipe takes light, airy, puffcorn and coats every piece in a rich homemade caramel before baking it low and slow until perfectly crisp. It’s sweet, buttery, crunchy, and completely addictive—which is exactly why so many people lovingly call it “Caramel Puff Corn Crack.” Whether you’re making it for movie night, holiday gift tins, game day, or just because, this easy snack disappears fast!
Why You’ll Love This Caramel Puff Corn
There’s a reason this Caramel Puff Corn disappears so quickly every time I make it! It’s one of those simple recipes that tastes like you spent hours in the kitchen, even though it’s incredibly easy to put together.
- Perfectly sweet and buttery. Every piece is coated in a rich homemade caramel that’s crisp, buttery, and full of flavor.
- Light and crunchy. Using puff corn instead of popcorn means there are no kernels to get stuck in your teeth—just melt-in-your-mouth crunch.
- Easy to make. With just a handful of pantry staples and a low oven, this recipe comes together with very little hands-on time.
- Perfect for sharing. Whether you’re making it for holiday gift tins, game day, movie night, bake sales, or family gatherings, this recipe always disappears fast.
- Stays fresh for days. Store it in an airtight container and enjoy crunchy caramel puff corn all week long.
- Completely addictive. There’s a reason so many people call it “Caramel Puff Corn Crack”—once you start snacking, it’s hard to stop!
I especially love making a big batch around the holidays because it’s one of those treats everyone asks for year after year. It’s also perfect for packaging in festive bags or tins to give as homemade gifts that friends and neighbors will love.
Tips for the Best Caramel Puff Corn
A few simple tricks will help you get perfectly crisp, buttery Caramel Puff Corn every single time.
- Use fresh puff corn. Fresh puff corn has the lightest texture and holds the caramel coating better. If it’s stale, your finished snack won’t be as crisp.
- Don’t substitute microwave butter or margarine. Real salted butter gives this recipe the richest flavor and helps the caramel set properly. Margarine can make the coating softer and less crisp.
- Don’t rush the caramel. Once the caramel reaches a rolling boil, let it cook for the full 5 minutes. This helps it develop the rich caramel flavor and ensures it sets up properly after baking.
- Stir in the baking soda last. The baking soda creates a light, foamy caramel that coats every piece of puff corn more evenly. Don’t skip this step—it makes a big difference!
- Work quickly. As soon as the caramel is ready, pour it over the puff corn and stir immediately before it begins to thicken.
- Stir every 15 minutes while baking. This keeps the caramel evenly distributed and prevents large clumps from forming.
- Spread it out to cool. After baking, transfer the caramel puff corn to a wax paper- or parchment-lined baking sheet. Spreading it out helps it cool faster and keeps the pieces from sticking together.
- Let it cool completely. Resist the temptation to dig in right away! The caramel becomes crisp as it cools, giving you that irresistible crunchy texture.
- Store it in an airtight container. Once completely cool, keep your Caramel Puff Corn in a tightly sealed container at room temperature. It will stay fresh and crunchy for up to a week.
Ingredients:
- 6.5oz puffed corn (I use Chesters brand – 2 (3.25oz) bags
- 1-1/2 cups firmly packed brown sugar
- 1 cup salted butter
- 1/2 cup light corn syrup
- 1/2 teaspoon salt
- 1 tablespoon vanilla extract
- 1 teaspoon baking soda
Instructions:
- Heat oven to 200°F
- Place both bags of puffcorn into a large roasting pan; set aside
- Combine the butter, brown sugar, corn syrup and salt in a large saucepan. Cook over medium heat, stirring occasionally, until the mixture comes to a rolling boil. Once it is boiling, keep cooking for 5 minutes, stirring every minute or so
- Remove from the heat; stir in the vanilla and then stir in the baking soda. The mixture will turn foamy
- Carefully pour the foam over the puff corn and stir until well covered
- Transfer to the oven, and cook for 1 hour, stirring every 15 minutes, or until the puffed corn is nice and crisp
- Use a spatula to immediately place the caramel corn on to a large baking sheet lined with waxed paper and let cool completely
- Break the caramel corn in to bite sized pieces and place in a tightly sealed container to keep fresh


Easy Caramel Puff Corn Snack
EQUIPMENT (Amazon Associate Links)
Ingredients
- 6.5 oz puffed corn I use Chesters brand - 2 (3.25oz bags)
- 1.5 cups firmly packed brown sugar
- 1 cup salted butter
- 1/2 cup light corn syrup
- 1/2 teaspoon salt
- 1 tablespoon vanilla extract
- 1 teaspoon baking soda
Instructions
- Heat oven to 200°F
- Place both bags of puffcorn into a large roasting pan; set aside
- Combine the butter, brown sugar, corn syrup and salt in a large saucepan. Cook over medium heat, stirring occasionally, until the mixture comes to a rolling boil. Once it is boiling, keep cooking for 5 minutes, stirring every minute or so
- Remove from the heat; stir in the vanilla and then stir in the baking soda. The mixture will turn foamy
- Carefully pour the foam over the puff corn and stir until well covered
- Transfer to the oven, and cook for 1 hour, stirring every 15 minutes, or until the puffed corn is nice and crisp
- Use a spatula to immediately place the caramel corn on to a large baking sheet lined with waxed paper and let cool completely
- Break the caramel corn in to bite sized pieces and place in a tightly sealed container to keep fresh
Notes
- Use fresh puff corn. Fresh puff corn has the lightest texture and holds the caramel coating better. If it's stale, your finished snack won't be as crisp.
- Don't substitute microwave butter or margarine. Real salted butter gives this recipe the richest flavor and helps the caramel set properly. Margarine can make the coating softer and less crisp.
- Don't rush the caramel. Once the caramel reaches a rolling boil, let it cook for the full 5 minutes. This helps it develop the rich caramel flavor and ensures it sets up properly after baking.
- Stir in the baking soda last. The baking soda creates a light, foamy caramel that coats every piece of puff corn more evenly. Don't skip this step—it makes a big difference!
- Work quickly. As soon as the caramel is ready, pour it over the puff corn and stir immediately before it begins to thicken.
- Stir every 15 minutes while baking. This keeps the caramel evenly distributed and prevents large clumps from forming.
- Spread it out to cool. After baking, transfer the caramel puff corn to a wax paper- or parchment-lined baking sheet. Spreading it out helps it cool faster and keeps the pieces from sticking together.
- Let it cool completely. Resist the temptation to dig in right away! The caramel becomes crisp as it cools, giving you that irresistible crunchy texture.
- Store it in an airtight container. Once completely cool, kee
Easy Caramel Puff Corn FAQ’s:
Can I use popcorn instead of puffcorn?
Yes! While this recipe is designed for puffcorn, the caramel coating also works well on plain popped popcorn. Just be sure to remove any unpopped kernels first.
Why do you add baking soda to the caramel?
The baking soda causes the caramel to foam, making it lighter and easier to coat every piece of puffcorn evenly.
Why do I bake the caramel puff corn?
Baking dries the caramel coating, giving it that crisp, crunchy texture while preventing it from becoming sticky.
How long does caramel puff corn stay fresh?
Stored in an airtight container at room temperature, it stays fresh and crunchy for up to one week.
Can I freeze caramel puff corn?
Yes! Once completely cooled, freeze it in an airtight freezer bag for up to three months. Let it come to room temperature before serving.
Can I make this ahead of time?
Absolutely! This is one of the best make-ahead snacks for parties, holidays, and gift giving because it stays fresh for several days.


0 Comments